Yes, I’ve been productive last week. Last night I sanded down some pieces I had cast some days ago, finally revealing their true shape. One piece contains some of Marcus’ burl and I wanted to try something new and I’m quite happy with the result, unlike with yesterday’s catastrophe.
The piece started out as your basic square block. I drew the oval shape I wanted it to be on the back and the front and then set to shape it with the belt sander (this time without also sanding my hand in the meantime. It’s a nice scar I got myself the last time). After I had the general shape I set to creating a dome so it would become a regular cabochon. I’m sure you have already spotted the problem here: taking out one sharp edge with the belt sander creates two more, so I only worked out the basic shape and then went to hand sanding.

©Giliell, all rights reserved
This is what I got after the belt sander. You can see the shape and also the deep, deep scratches. Now sanding paper creates the same problem as the belt sander, unless you keep the piece still and move the sanding paper. I prefer a different method for smoothing edges: First I like working with sanding fleece anyway. For the rough sanding it’s much more durable than the sanding paper. It#s also thick so it creates naturally smooth curves. Once the rough sanding was done I simply placed my wet sanding paper on top of a piece of fleece and kept sanding. It’s a hell lot of work, but I can tell you, the moment when you wash off the grit and for the first time it becomes really transparent and shiny? Pure magic! With this piece that happened at a 3000 grit and got “fixed” with abrasive paste.

©Giliell, all rights reserved

©Giliell, all rights reserved
Now I have to figure out how to turn it into a necklace…
But wait, there’s more!

©Giliell, all rights reserved
This little fellow is a scrap of pear wood. It is part of a longer piece. the top got turned into something else and the bottom got turned into this. Isn’t that wood gorgeous?

©Giliell, all rights reserved
I tried to give it roughly a crystal shape, but it would not hold the edges. I’m not sorry, I love it the way it is. Also, it’s shape just nice to hold.
The last piece is oak wood. I experimented with some cheap pearl pigment and I quite like the effect:
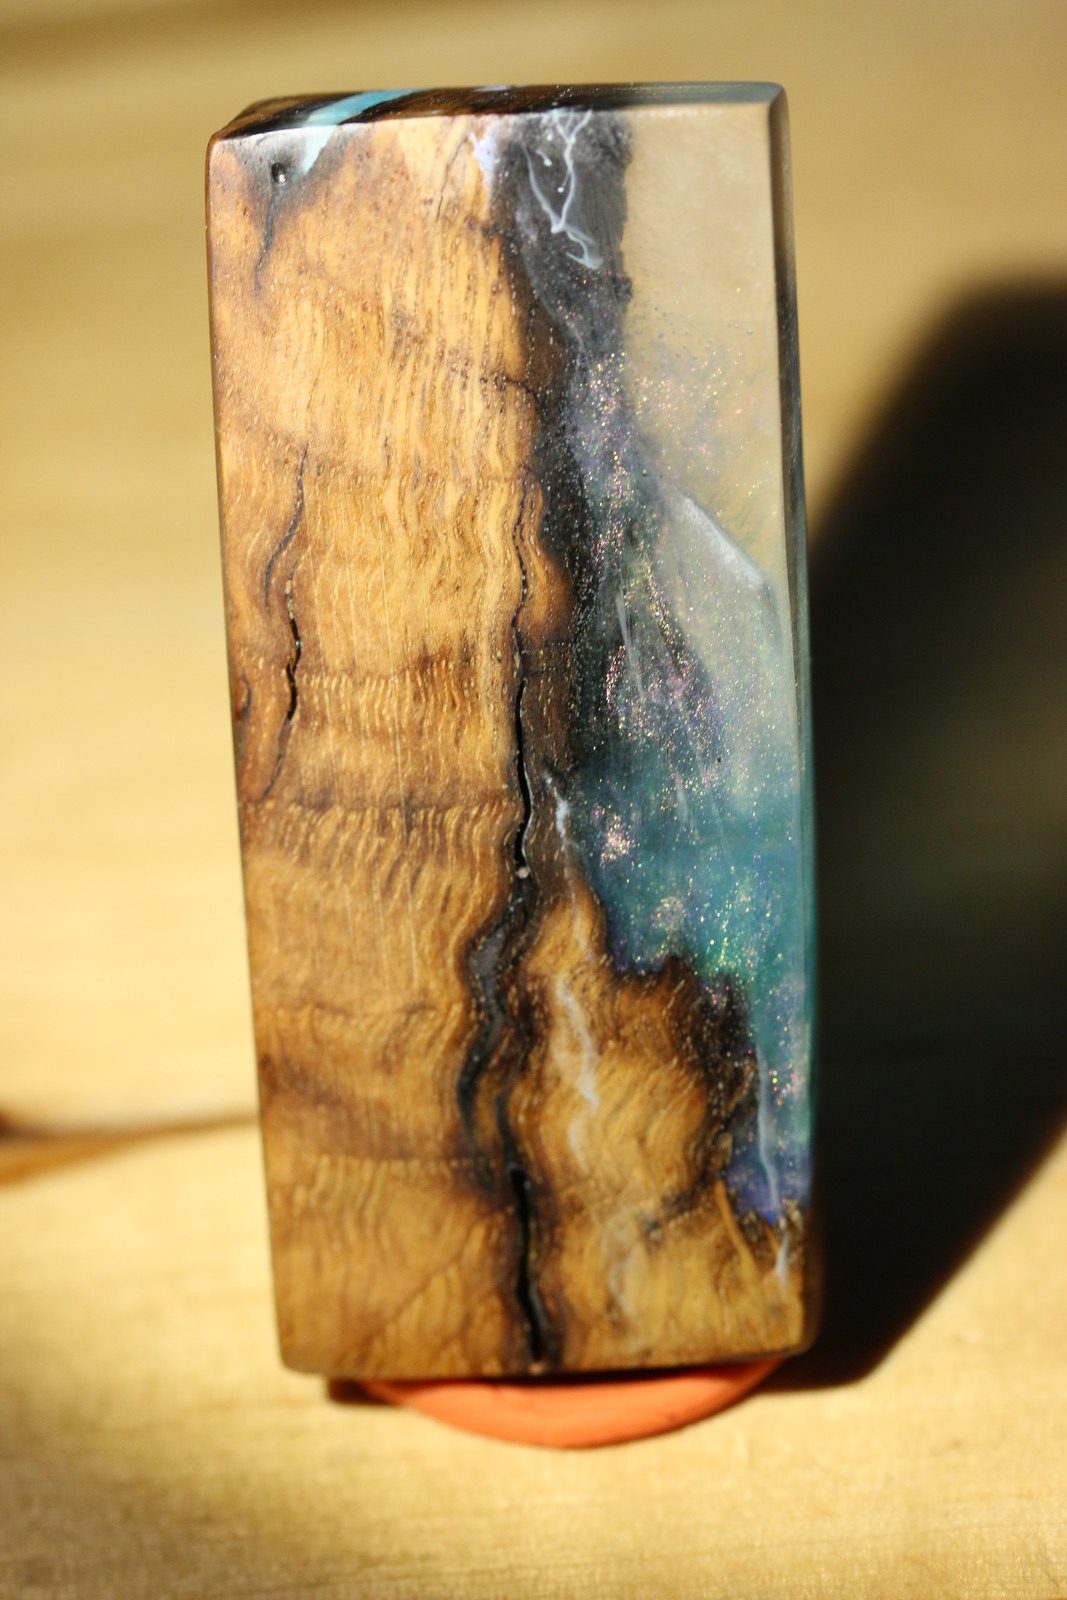
©Giliell, all rights reserved

©Giliell, all rights reserved
Since I had some problems with the sticky tape that enclosed the cast getting stuck in the resin I had to take off quite a lot of material, but I am please with the result nevertheless.
Wow! The first one is stunning, it looks like coral growing from the wood or maybe one of those tiny cup lichens, really beautiful. The others are beautiful too, but they don’t grab me the way the first one does.
I wonder if you could make some sort of fine net that would carry the first one safely?
Amazing! I’m gobsmacked that you are doing these by hand… that’s so much work.
The thing I hate about resin is the way it loads up sanding belts. It just murders them.
I bet those feel great in your hand.
Such a cool pairing between wood and resin! I like the pear wood piece. Really nice.
Oy, pretties!
I love the roughness encased in smoothness.