As I said last time, I am going to make multiple knives in parallel, because I think that a non-trivial amount of time can be saved just by that. I had all my steel already straightened, so I could go right away to drawing, drilling and shaping. First thing to be done was to draw and drill one blade on one half of one steel bar. That I have subsequently used as a template to drill holes in the other half and in all the other steel bars.
©Charly, all rights reserved. Click for full size.
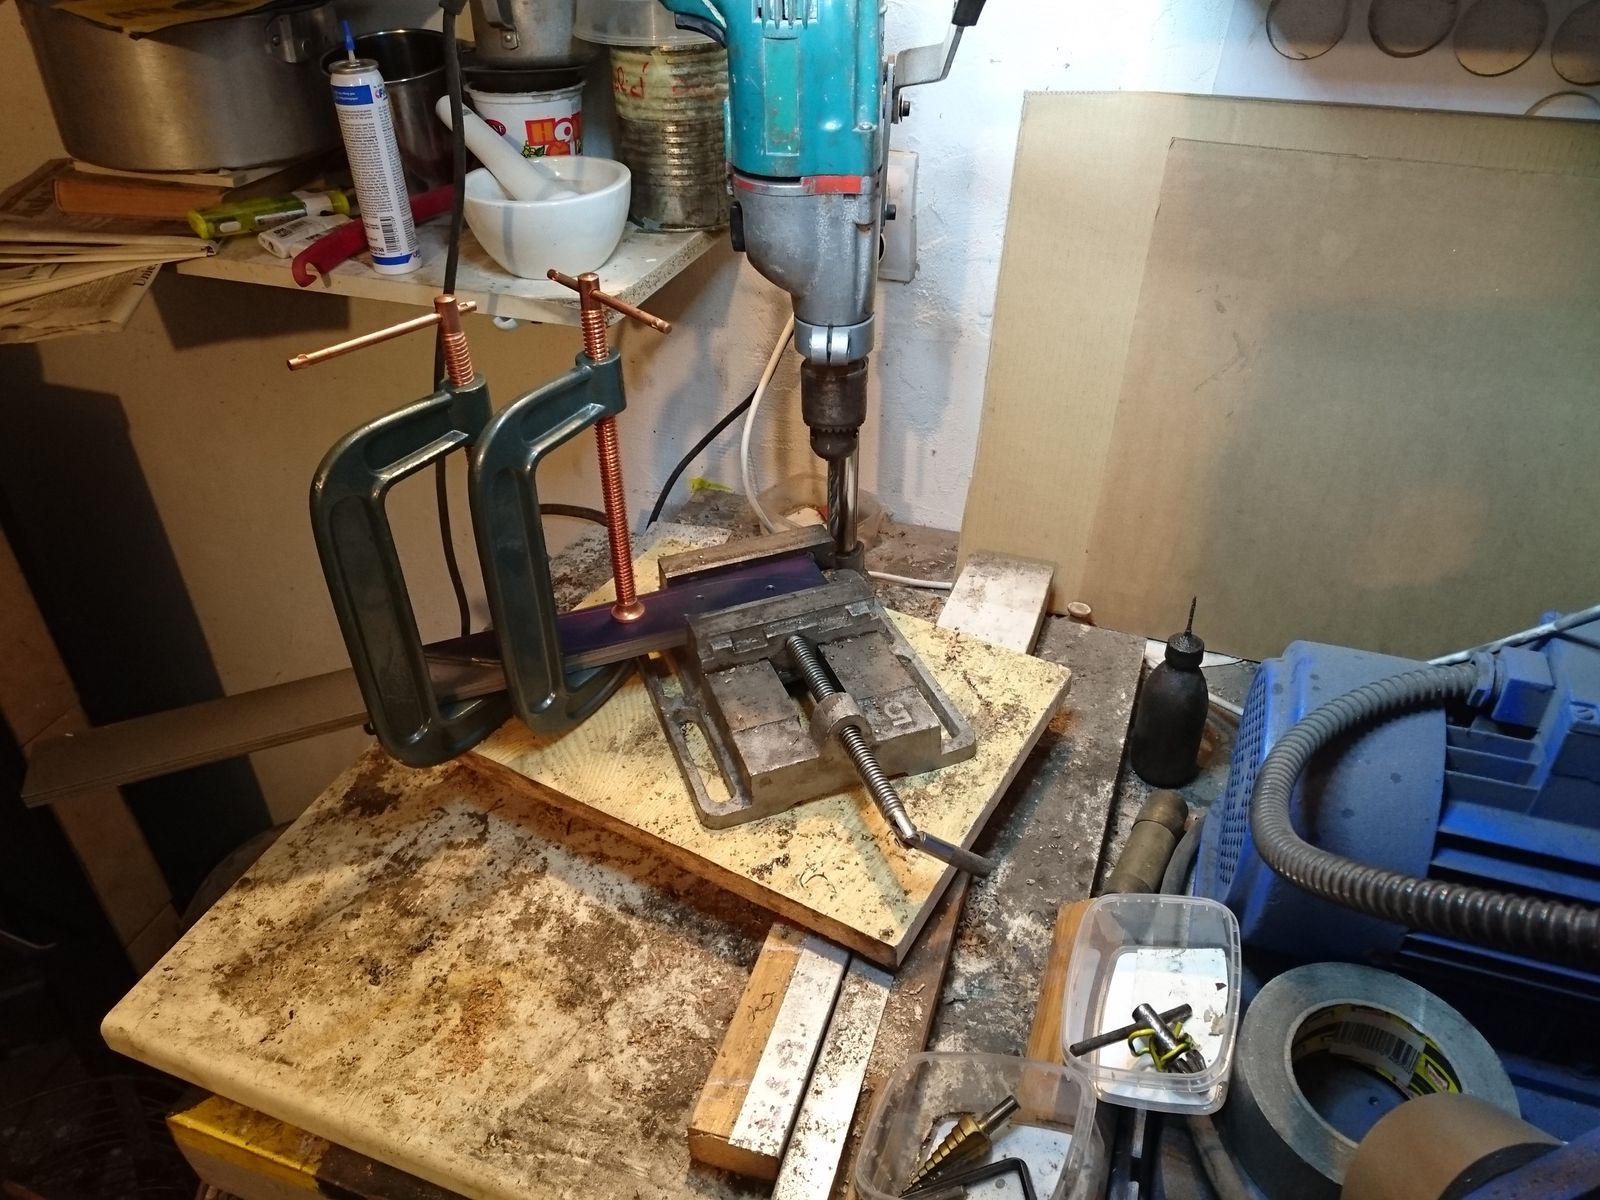
For the drilling I clamped the template firmly with the drilled steel bars and before proceeding to the other side I inserted a steel pin in the drilled hole so the bars do not shift and slide. This has saved some time, despite it being a step with negligible time in the analysis, but my main hope here is that this work on multiple pieces in parallel brings better reproducibility regarding the hole positions and and that better reproducibility could save me some time later on when shaping the handle scales.
I have learned two lessons, one of them rather expensive. First lesson was that for this I have to take the 6 mm drill bits as de-facto consumable material, because I blunted and subsequently broke one towards the end despite using copious amounts of cutting oil. And I do not think it can be avoided.
Second lesson was that I really have to buy a new drill press, and preferably one with continuously regulated speed at that. My jury-rigged press with a very old hand drill has only two speeds and both of them are apparently too high for drilling 16 mm hole in 1,8 mm steel. Towards the end of the work the step drill bit overheated and it got irreversibly blunted on the 16 mm step. Ouch. That drill bit costs 40,-€. I think this investment is unavoidable, if I want to save time I cannot take the bit out and dunk it in water after each drilled hole, slower rotations would be better. And I cannot buy 40,-€ drill bit for each dozen of knives I make – that money be best saved for grinding belts. Hobby or not, at this rate I would spend the price of an acceptable small to middle sized drill press (300-400,-€) on the drill bits rather quickly.
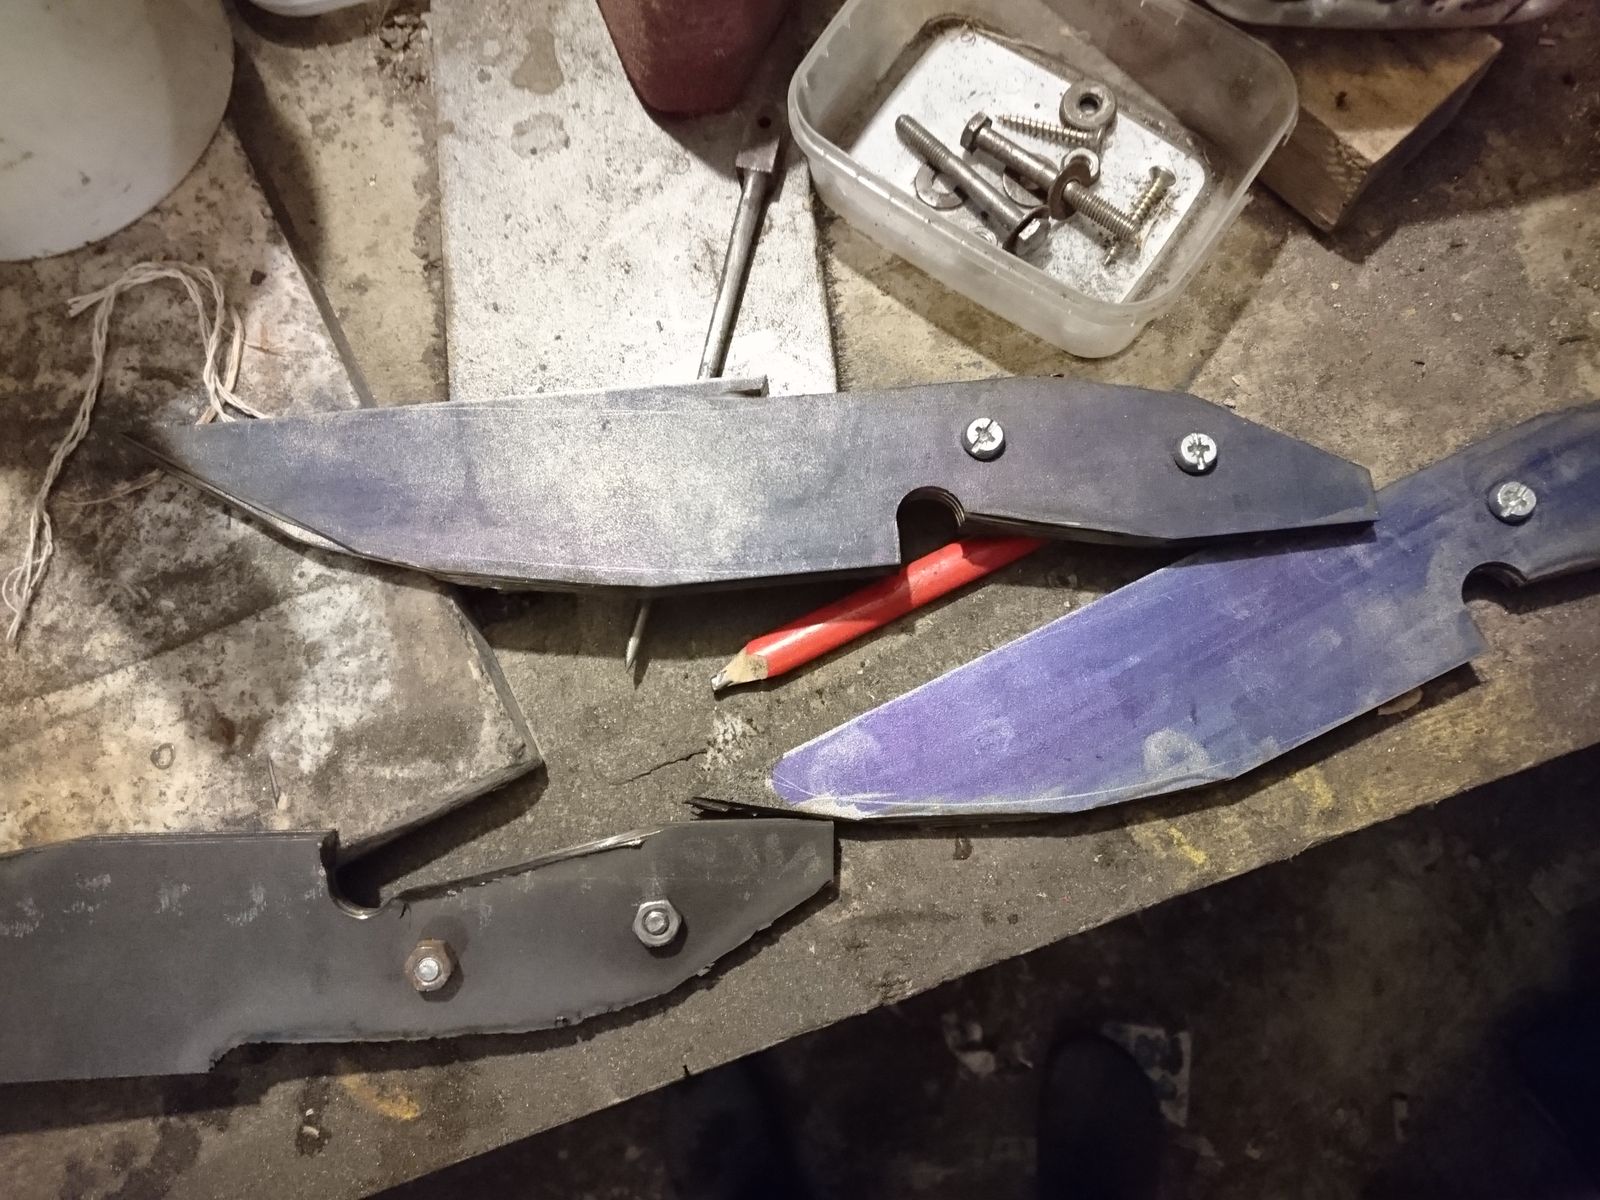
Cutting the blanks in half and roughly cutting the outlines of the blades with an angle grinder did not take long at all. and working on multiple blades in parallel seemed to work comparatively well. But for the sake of precision, next time I will halve the blanks individually – two came out somehow too short and two too long. Not by much, but it is noticeable. The end result were three stacks of four roughly cut blades.
©Charly, all rights reserved. Click for full size.
Before this step took me 15 minutes per blade, now it was 10 minutes per blade (teasing out broken 6mm drill bit and fruitlessly trying to drill a hole with blunted 16mm drill bit included). So I would call it a semi-success. I learned some do’s and dont’s and I achieved my two goals – the holes in the tangs align across all 12 blades nicely and I have saved some time without even really trying to.
Thats going to be more time saved with a proper drill press isn’t it?
Do you think that another possible lesson from cutting out the blades is that you need to allow slightly larger margins? I have no experience cutting metals, but with some fabrics you have to allow more space between pattern pieces because of the way the fabric moves about however careful you are. Probably completely irrelevant to chunks of metal.
@Jazzlet, that is true, however I am limited by the size of stock that I can buy, and I am trying to use as much of each piece as I can, Fortunately I am not bound by any size specifications -- as long as the knife comes out OK, it does not matter much if it is a few mm longer or shorter than the next one. Important is the position of the holes -- if those line up it means I can make the rough handle scales en masse and not to fuss about which scales belong to which blade. But the length of the blade can be variable without too much of a problem.
Well that seems like a good beginning, Charly. I’m looking forward to seeing how you tackle some of the crafting stages that took up the most time.
This is really cool! On the cooling down of stuff: yes, I realize that this makes a huge mess, but it did not bother me in my own workspace: I went to a veterinarian and asked to buy an IV bag for a horse. At least here, these come with a zip-lock-type top, that you can open and close to add water, and there is a very strong and big hole that you can use to hang it up. They hold one liter. Then it’s just a matter of adjusting the drip to your satisfaction, and getting the hose fixed up so the drip happens where you want.
I used to carve stones, and that was how I did it without burning out my diamond-tipped burs (or cracking the gemstone!). I think the bag cost me $5.00 but again that was here, and it was a while ago… I have the idea somehow that you don’t live in the middle of downtown, so maybe there is a friendly vet nearby who would sell you this?
In the meantime this is exciting to see you do multiples!
Charly,
Pinning the first hole to align the rest of the holes is an old secret, (passed very early in training an apprentice), specially while the multiple layers are still clamped by “C” clamps. Best pin I have found is the chuck end of your 6mm burned, dull, drill bits. That bad drill bit is now a perfect sized pin(dowel) to use for alignment. You just have to file off the “chuck burrs” that mar the chuck end of a drill bit, that happens when a bit gets stuck and stops spinning with the press, until friction in the chuck causes the 3 jaws of the chuck to dig into the shank (chuck end) of the drill bit and make a ‘divot’ in the shank.
I’ve used over 100,000 drill bits in my career as maintenance in the steel fabrication industry.
I use “pilot” drills as first hole, in your case a 2.5mm or 3mm drill bit to punch the first (guide) hole. This bit I spin at 1200 t0 1600 RPM. A 3mm drill bit will only wander off wanted hole location by about 1/8 diameter, maximum, usually way less, so hole location remains true to wanted specifications.
Then, I chuck the finish size drill bit, in your case 6MM, and it will follow the pilot hole with it’s cutting flutes very easily, as the very nearly flat guide point of the drill bit no longer has to cut a guide path through the steel, it follows the “pilot” hole, as the easiest path. In this case, with only 6mm as the final hole size, there is no need to change speed of the drill press,(though the 6mm will cut better at 1200 RPM), and it will cut like butter, stay sharp, and not burn your full size bits to nobs of molten resistance.
Twice through the drill press sounds like twice the work, but it really works out to about 2/3rds the work of trying to use a finish drill as the only puncture of the steel. Added bonus, accuracy of drilled holes is up over 60%.
Dakota Grease Monkey
@dakotagreasemonkey I have not used pilot holes, because my drill press is a bit wibbly-wobbly and drilling with anything smaller than 4 mm is guaranteed to break the drill bit unless I drill very, very slowly and carefully (and often even then). So I avoid drilling very small holes unless it is really absolutely necessary. That is why I drilled first 6 mm holes in a template with the step drill bit, because that one makes its own 4 mm pivot hole, and then I used that template to drill directly 6 mm holes for the rest.
Clamping the stacks together and pre-drill 3 mm holes in the whole stack and then drill it with 6 mm would be better and it would also reduce the blunting and breaking risk for the 6 mm bit, but as I said, with my current drill press I do not have that option.
I am indeed keeping broken drill bits and using them as precision-pins.
Ahhh, a drill press, one of the things I really want when we finally manage to set up an actual work bench. Now, I won#t be getting a real drill press, but I will insist on a system that allows fitting your drill to it. And I need a good drill, because now we have my cordless drill, which is a really good one for a cordless drill, and my father in law’s hammer drill, which is a very good one as well, but that leaves a gap in the middle. We can either go for “tiny” or “huge” and sometimes neither is appropriate.