I will share with you a proper analysis of the acquired data, but I just finished a little experiment and I am too eager to share the results.
Without too big analyzing of anything, it is clear at even a casual glance that polishing is the most time-consuming part of the job. It is also the most boring part, in my opinion, because not much can be done and the opportunities for a mess-up are numerous. It is necessary to go through the laborious process for fancy knives, like Ciri’s dagger, but for a kitchen knife without any ribs or facets it is a waste of time.
For over twenty-five years, ever since I read about the technique in ABC as a kid, I wanted to try a process that goes under many names, “tumbling” being probably the most known one. I have even mentioned the device for it in the article “The Handmade Dilemma” as a “polishing drum”. It is a technique that has been in use for thousands of years, literally – for example Bohemian Crown Jewels contain precious stones that were polished this way. And it has been tried and used for knife finishing both on commercial and hobby scale. All that it takes is having the polished things in a rotating drum where they tumble over each other, sometimes with the help of a polishing medium, sometimes without. A very simple machine, and had I lived by a stream I would build a water powered one years ago. Unfortunately I do not live near a stream and wind is too unpredictable so I am stuck with using electricity, and I have not got my hands on a motor with the right properties yet.
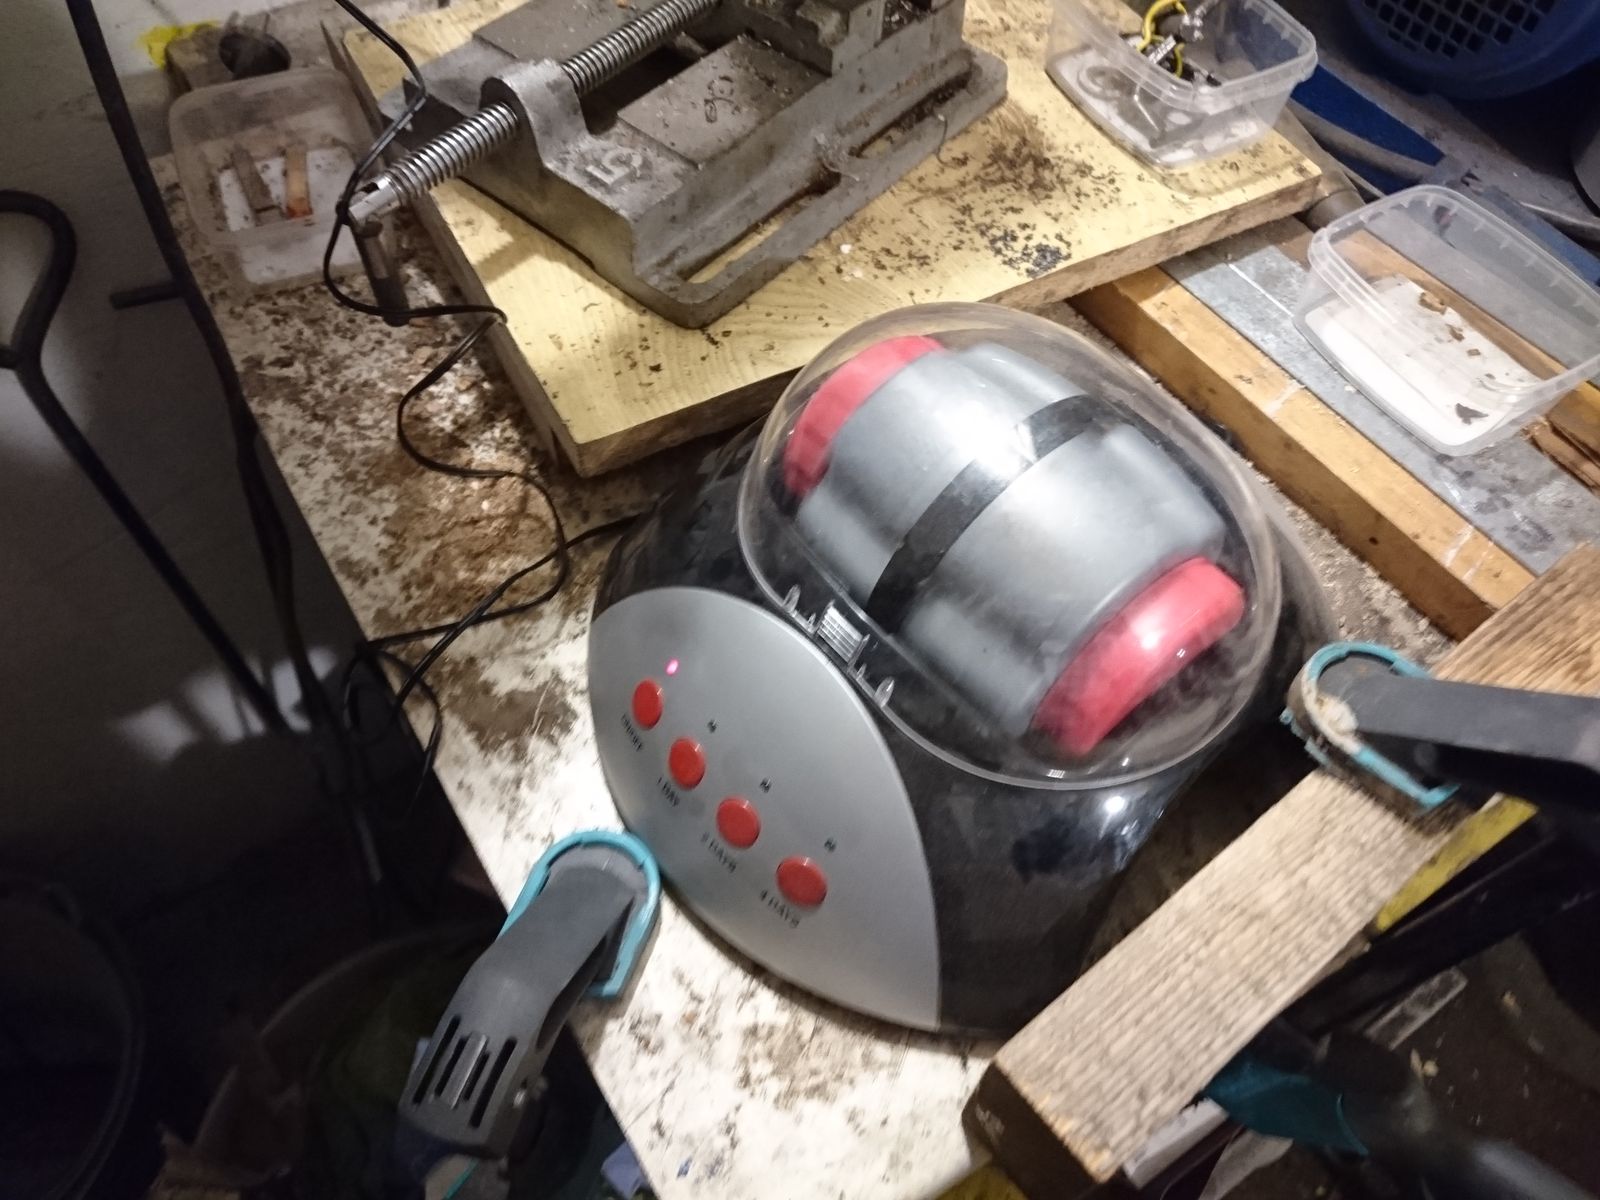 But I got lucky, my colleague has bought small toy tumbler for his son when he was little and they do not need it anymore, so he lent it to me a few months ago. As you can see, it is not big enough to hold a knife, not even a small one, so after I let it run with a few pieces of unhardened steel with very mixed and generally unsatisfactory results, it has collected dust again.

©Charly, all rights reserved. Click for full size.
But here was the second stroke of luck – I have bought a slab of high-carbon tool steel and I started to make myself a set of better hardness measuring gauges than the impromptu ones I have made from an old saw blade. I have already ground and hardened these little chisels to HRc 62, and I only cleaned the two big facets and sanded them up to 150 grit – that is the grit up to which the grinding and polishing is relatively quick and the blade does not heat up too much. I was not intending to high-polish these, since that would be silly. But I remembered the lent tumbler and checked if they fit in – and the did!
 So I chucked the blades into the polishing drum with a spoon of jeweler’s rouge and half filled it wiht crushed walnut shells, mixed it all up and let it run for one day. Bugger – it got blocked after unknown time and I only found out next day. So I started it again for one day. And the change in surface was remarkable. It was not polished, but the perpendicular sandpaper scratches were no longer visible and the surface has got a very nice satin sheen to it. But I like my blades mirror-polished, so I started it for another day. I took another chisel out and subjectively there was no change against the first day, so I assumed that this is as good as it gets (but I will let it run for one more day). But I also assumed that since there are no visible perpendicular scratches anymore, I can quickly buff it to mirror polish with the three buffing wheels that I have – and I was correct.
Here you can see four pictures taken with my digital microscope (courtesy of our quality department who tossed it away because they lost the installation CD – so I took it home and downloaded free software). Each picture represents a section approximately 10 mm wide in reality.

After 150 grit belt – parallel scratches perpendicular to the blade are very clearly visible.
©Charly, all rights reserved. Click for full size.
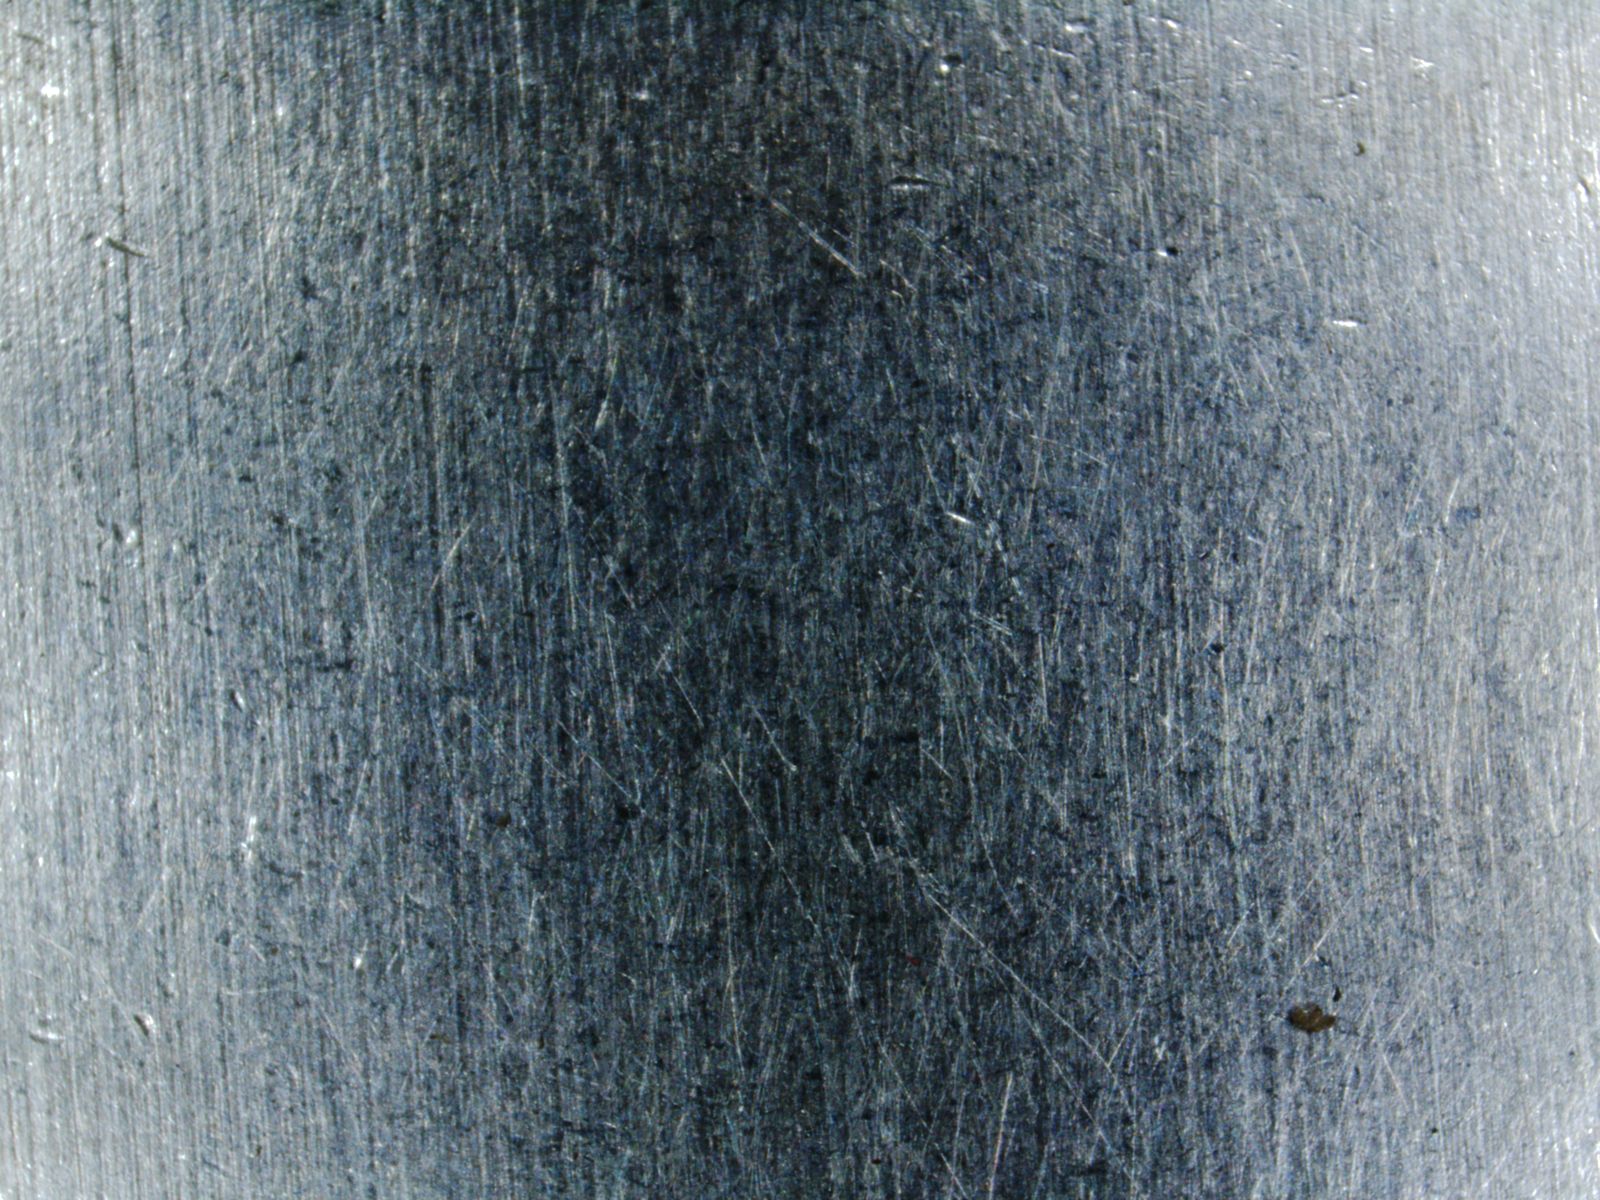
After one day, scratches from the sandpaper are no longer visible with the naked eye, but they are still visible under the microscope.
©Charly, all rights reserved. Click for full size.

After two days, the scratches from sandpaper are no longer visible even under the microscope unless you really look for them.
©Charly, all rights reserved. Click for full size.
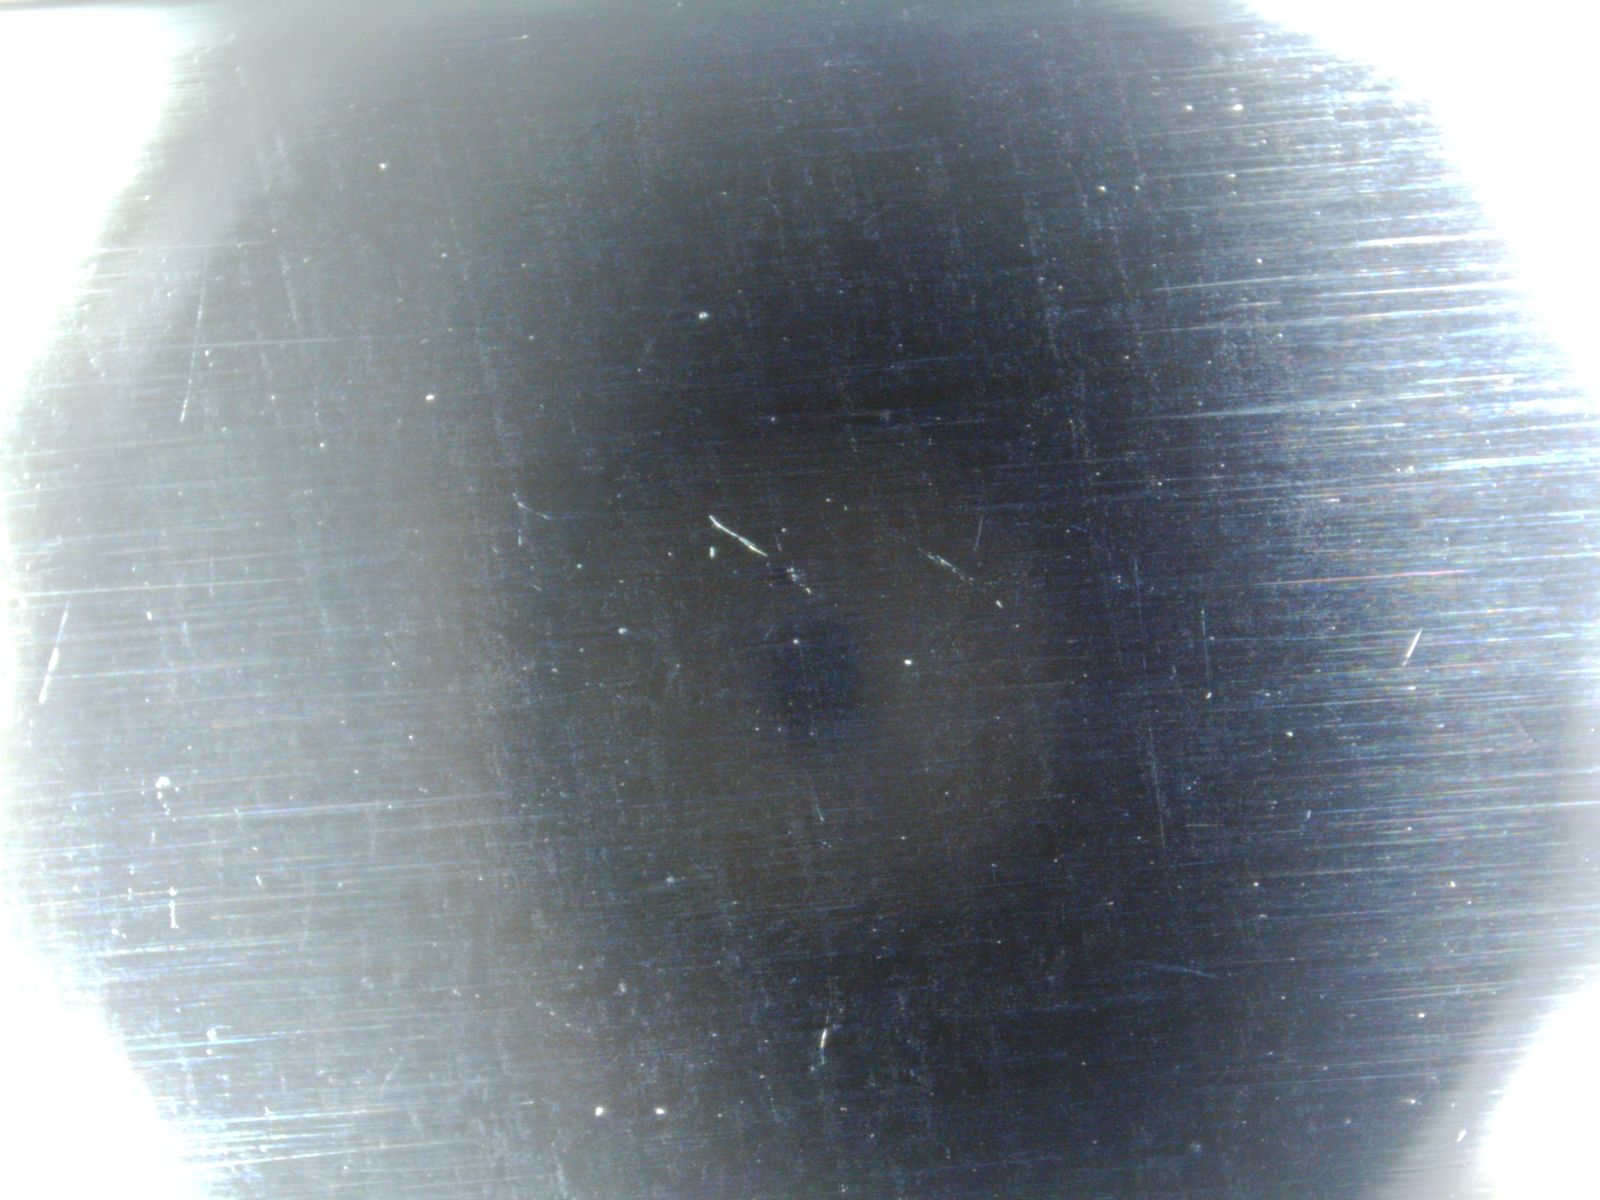
And after just a few minutes with the set of buffing wheels the scratches are no longer visible and the surface is so polished that the microscope photographs itself.
©Charly, all rights reserved. Click for full size.
Wonderful! I use a tumbler and sometimes leave things in there for as long as a week (usually 48 hours), but I’m after a super duper polish. I use stainless steel shot in my tumbler, and a healthy dollop of Dawn dishwashing detergent along with some water. Yeah, rouge is nice but… the dishwashing liquid gets the job done and it’s cheaper, so… Since you are using walnut shell the rouge is probably a better choice and you of course would not use water in that set-up.
The nice thing about mass finishing methods like that are that they happen gradually and automatically and in the meantime you can do other things! No need to stand there and hand-polish every single item one at a time. In my case (finishing jewelry) the cost of the tumbler is nothing compared to the hours and hours and hours of work that it saves me. And I’m still using the same machine after 14 years of use (a Lortone).
That’s a technique I’ve heard of and it’s interesting to see it in action, especially with the microscope shots.
Well, maybe you could get yourselves some hamsters and have a hamster wheel powered tumbler?
Sorry, I’m being silly.
Would a fan motor work?
@kestrel, why not use water? I did use it, because otherwise the rouge would fly everywhere upon opening the container. It made a sort of mud-like mixture, but it seems to work.
Oh and I am making my own rouge from steel rust, so it costs me nearly nothing. Of course I do not have a specified grit and is not of the best quality, but it gets the job done.
@Charly: I am used to this sort of gummy green stuff that you put in walnut shell, if you make your own rouge then sure! Use water! It is not good to use with the gummy green stuff, that’s all.
An interesting way to make rouge, and one I never thought of! I just buy it in bars to apply to my polishing wheels. I particularly like this one type of black rouge. It’s water soluble (not all of them are) and since it’s black, it looks good on my work (which has a black patina in the background). Since I use a black patina, if I miss cleaning off a tiny place of rouge, it does not show and the work still looks good.
Maybe I should submit a photo of my jewelry work, one of these days…
Jewler’s rouge is just iron oxide. You can harvest your own.
Joking aside -- there are sellers on ebay that offer various carbide grits by the pound for ${notverymuch}
That’s a cool way to handle a very onerous task.
I saw a jeweller (Rob Piland) who used a tumbler full of stainless steel mini-beads to polish/burnish. The results were amazing.
I’d be scared to put one of my blades in a tumbler for fear the ghost of Muramasa would come roaring out of the grave, spinning 2000rpm, to fuck me up.
The last picture is a bit creepy.
I’ve heard of polishing using a tumbler, but because of my previous, failed, attempt on making a career, tumbling also brings me mental images of debarking drums used in pulp mills. Of course, there are some similarities, the usually rough bark is removed by the logs tumbling and rubbing against each other, but that process is also more violent, with logs breaking to some extent and the drums are huge (20 -- 40 m long and 4 -- 6 m in diameter) and make a huge low-pitched rumbling noise.
Isn’t it wonderful when a plan works! So now that you know the results are acceptable does this make it ‘low hanging’ enough for investment? What about an old washing machine or dryer motor?
kestrel
Pretty please?
Some of those photomicrographs are quite artistic.
kestrel, yes, yes you should!
I will join the crownd and say: Kestrel, you should do that!
Seeing crafting process is always special and interessting. I did not know that the tumbler was used for blades!