I had a very busy Sunday. My vacation is nearing its end and I have been hell-bent on finishing this project already, but things got in the way all the time.
The biggest problem with the chape was that I could not find any information about how to do it properly. There are some pictures of finished products and some info about casting them from bronze, silver etc. but not about how to form one out of steel. So I had to start from scratch.
My first two attempts were completely unsuccessful. I do not even have anything to show you – you are free to imagine some vaguely rectangular and bent piece of metal. What I am going to show you is my third – and final – attempt. I do not call it a success either, but it is at least big enough part of a success to yield a usable product. But I am not satisfied with it and I had to repress the urge to hurl it out of the window with great force.
In retrospect I think my biggest mistake overall was using too thick steel. The shovel that I was recycling was ca 1,5 mm thick and for this purpose probably half that thickness would be appropriate. Unfortunately I did not find any suitable piece of steel in my scrap pile.
 Should anyone wish to avoid some of the mistakes I have made, here is the most important thing I learned: do not try to do it without dies and templates. It is a complete waste of time. Chape is a very complex piece of metal, bent and formed in multiple directions at once.
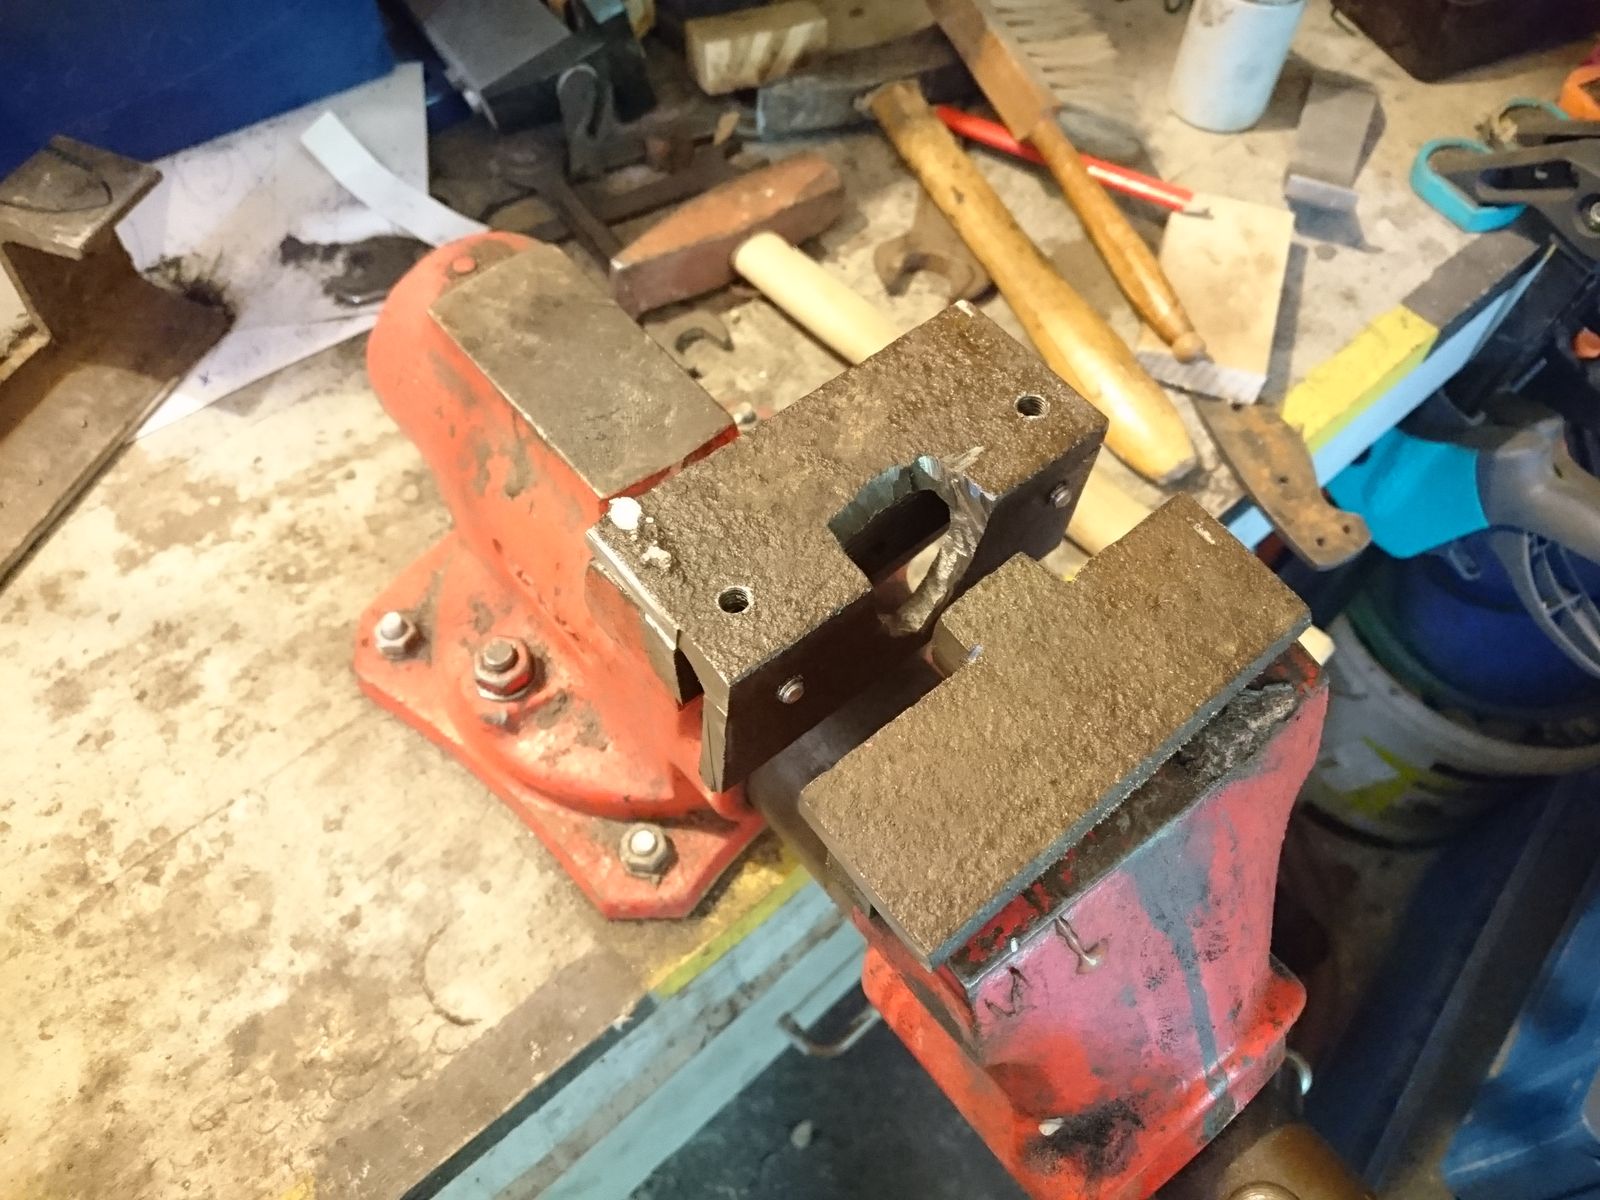
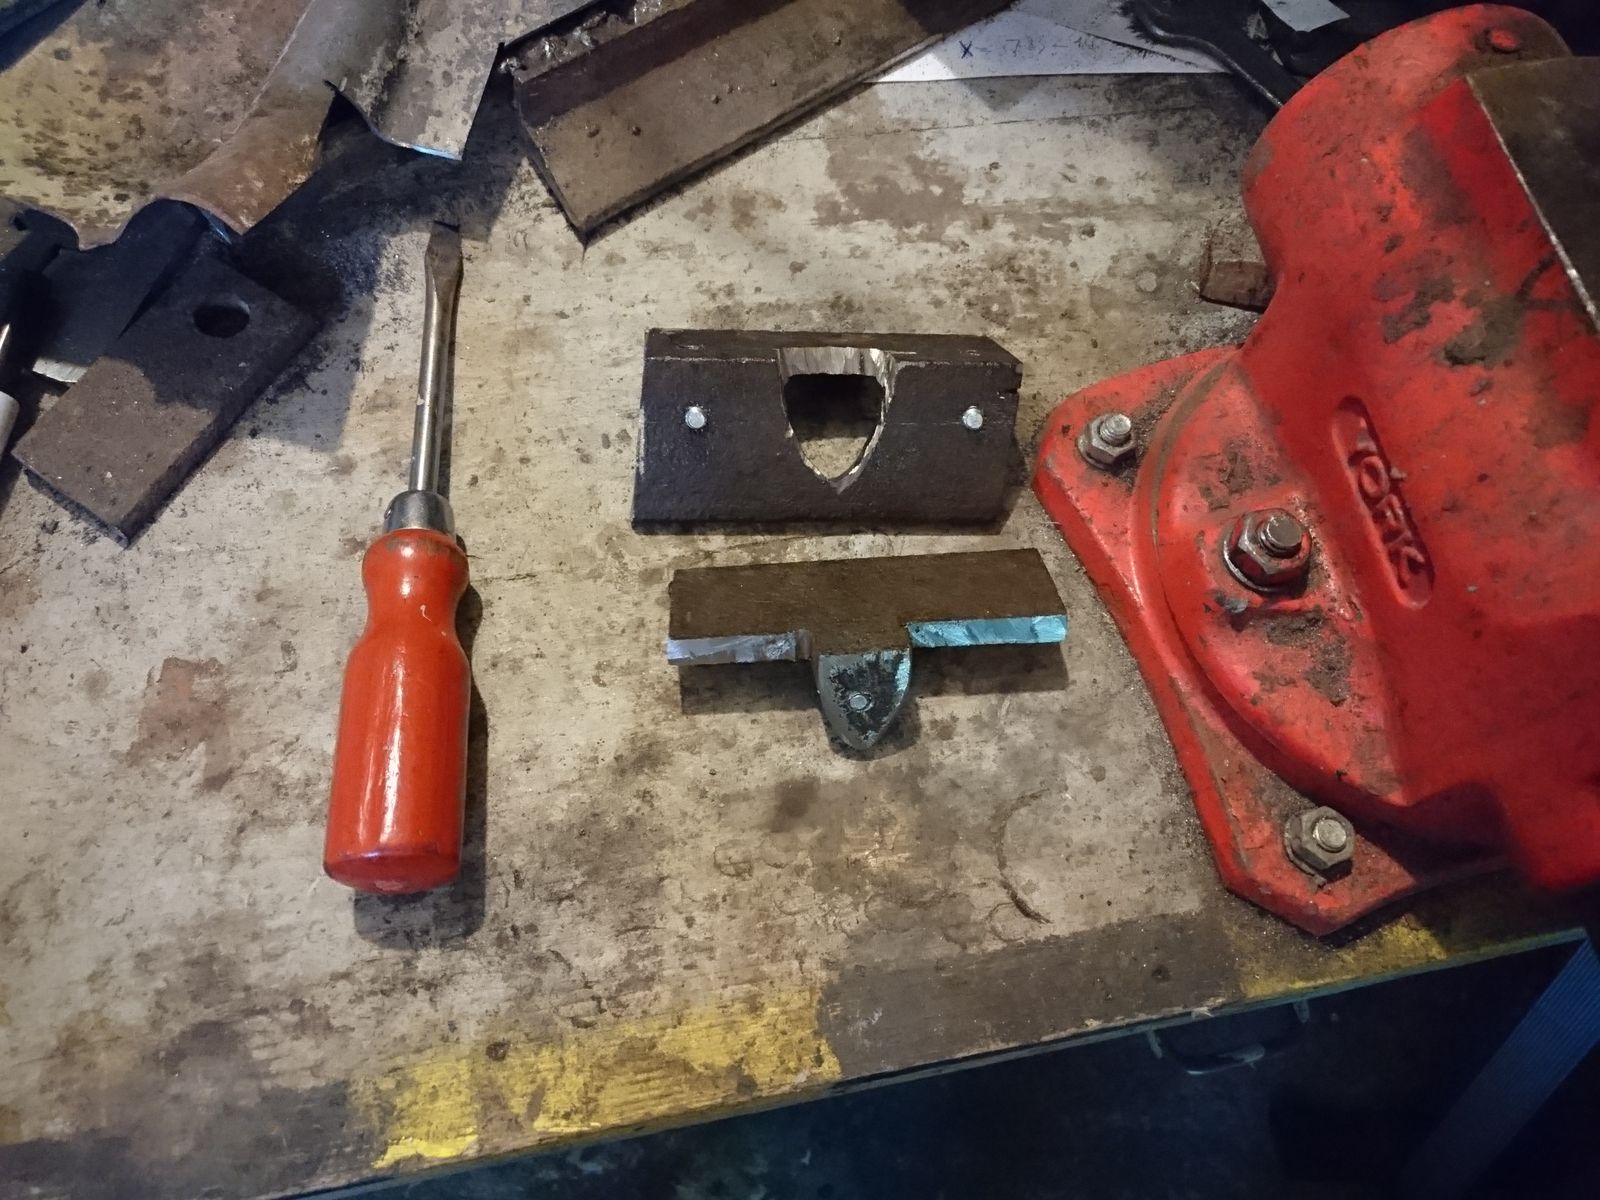 I wanted only the front face to be pretty, but even that has proved to be beyond being doable without a template, definitively without a skill that I lack. And since I also lack screw press, I had to do with my vice. So I have built a set of jaws – one formed approximately as the tip of the scabbard, and one with a matching hole about 2 mm bigger on all sides. After this I have heated a piece of steel, put it between the jaws and pressed it as quick as possible. After a few repeating and some repairs/adjustment of the jaws I have finally got a shape that at leat partly fitted the tip of the scabbard. I might be on the right track here.
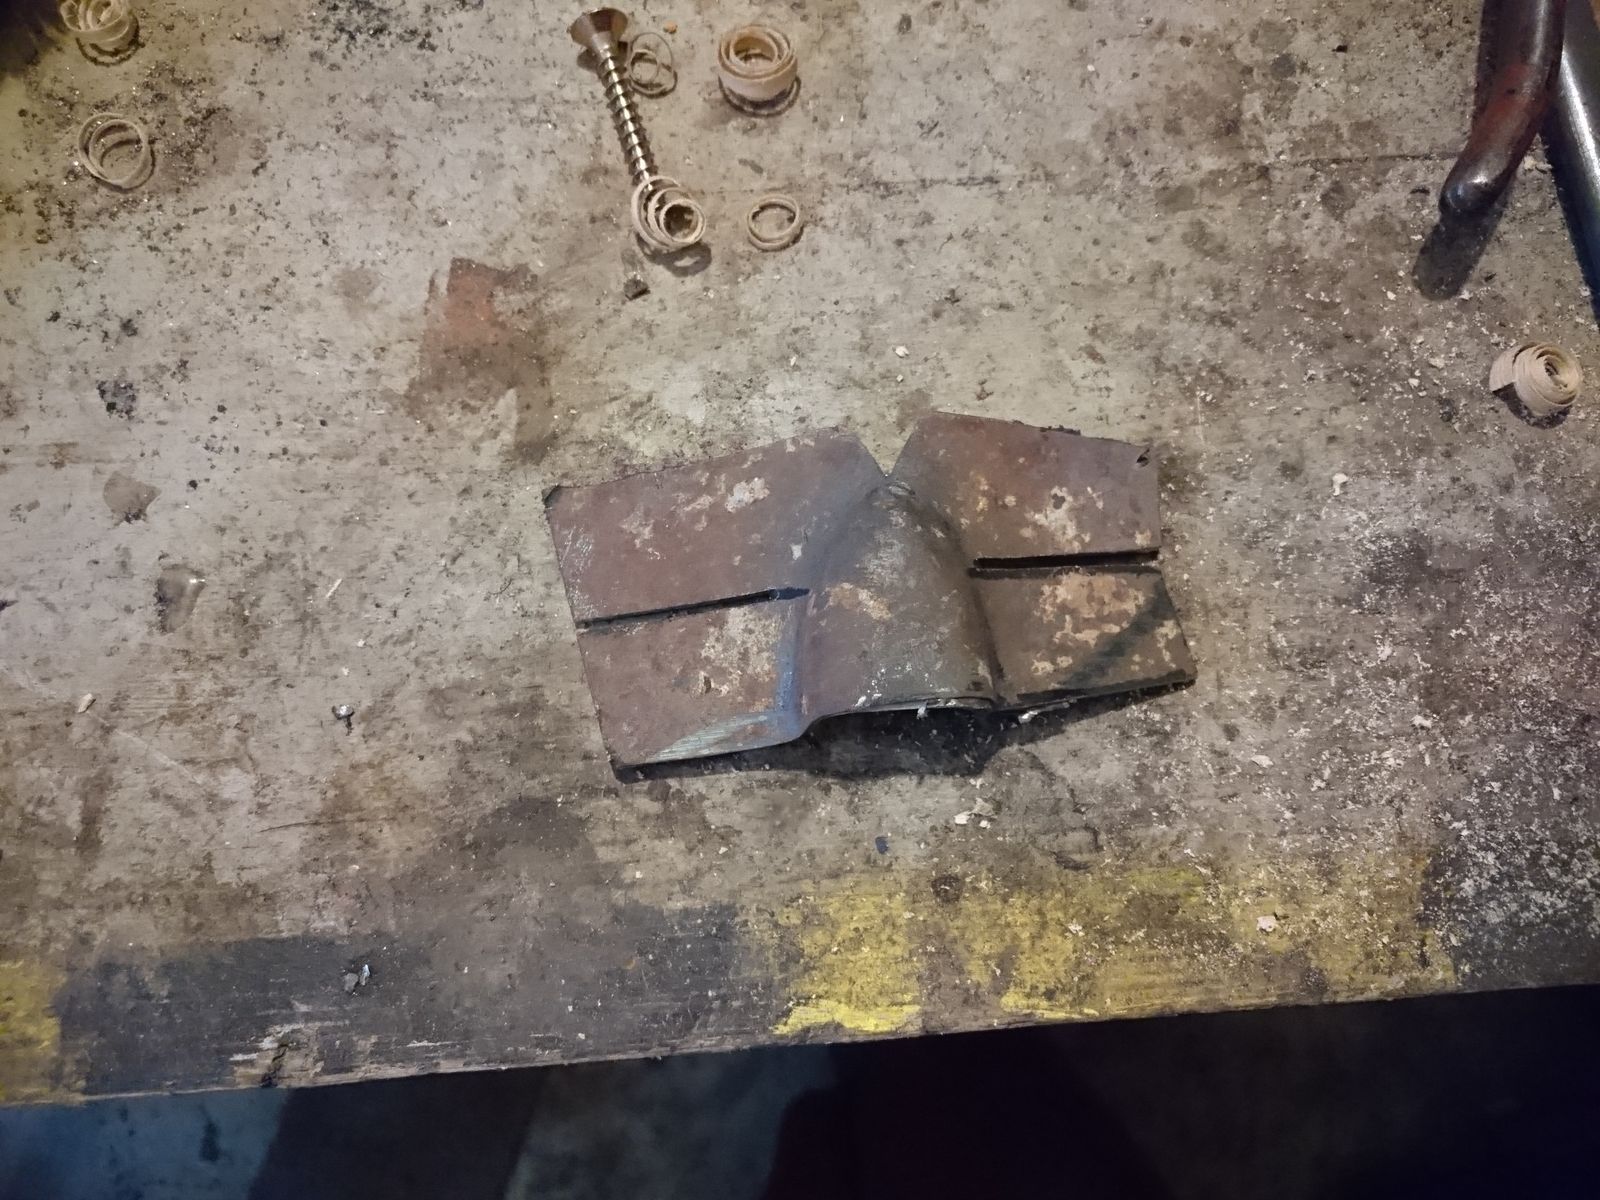
However, after a few presses the metal had nowhere to move – so I have cut it into stripes that I have intended to bend around the scabbard. I have again made the mistake of trying it first without a template. Again, complete waste of time. I have only managed to bend them so they point straight to the back of the chape. I could not achieve the second bend to close the flaps around the backside.
So I had to fish around in my scrap pile some more. Two cuts that were left over from making the jaws have proved to be useful here – when put back to back, they were the same thickness as the wooden scabbard, therefore I reasoned I could make a template out of them.
 So I took an angle grinder to them and made two nearly identical halves that mimicked the wooden scabbard. A few touches with a file were also needed in order to round the edges etc. I am not going to toss these, I am going to keep them as well as the jaws in case I need to do similarly shaped chape again.
I have deliberately made this template so most hammer blows will be perpendicular to the vice jaws. No matter how strongly you close the vice jaws on anything, hammering or filing/sawing it will eventually loosen it or break it. That is actually a reason why specially formed jaws with a groove have to be used for holding round stock.
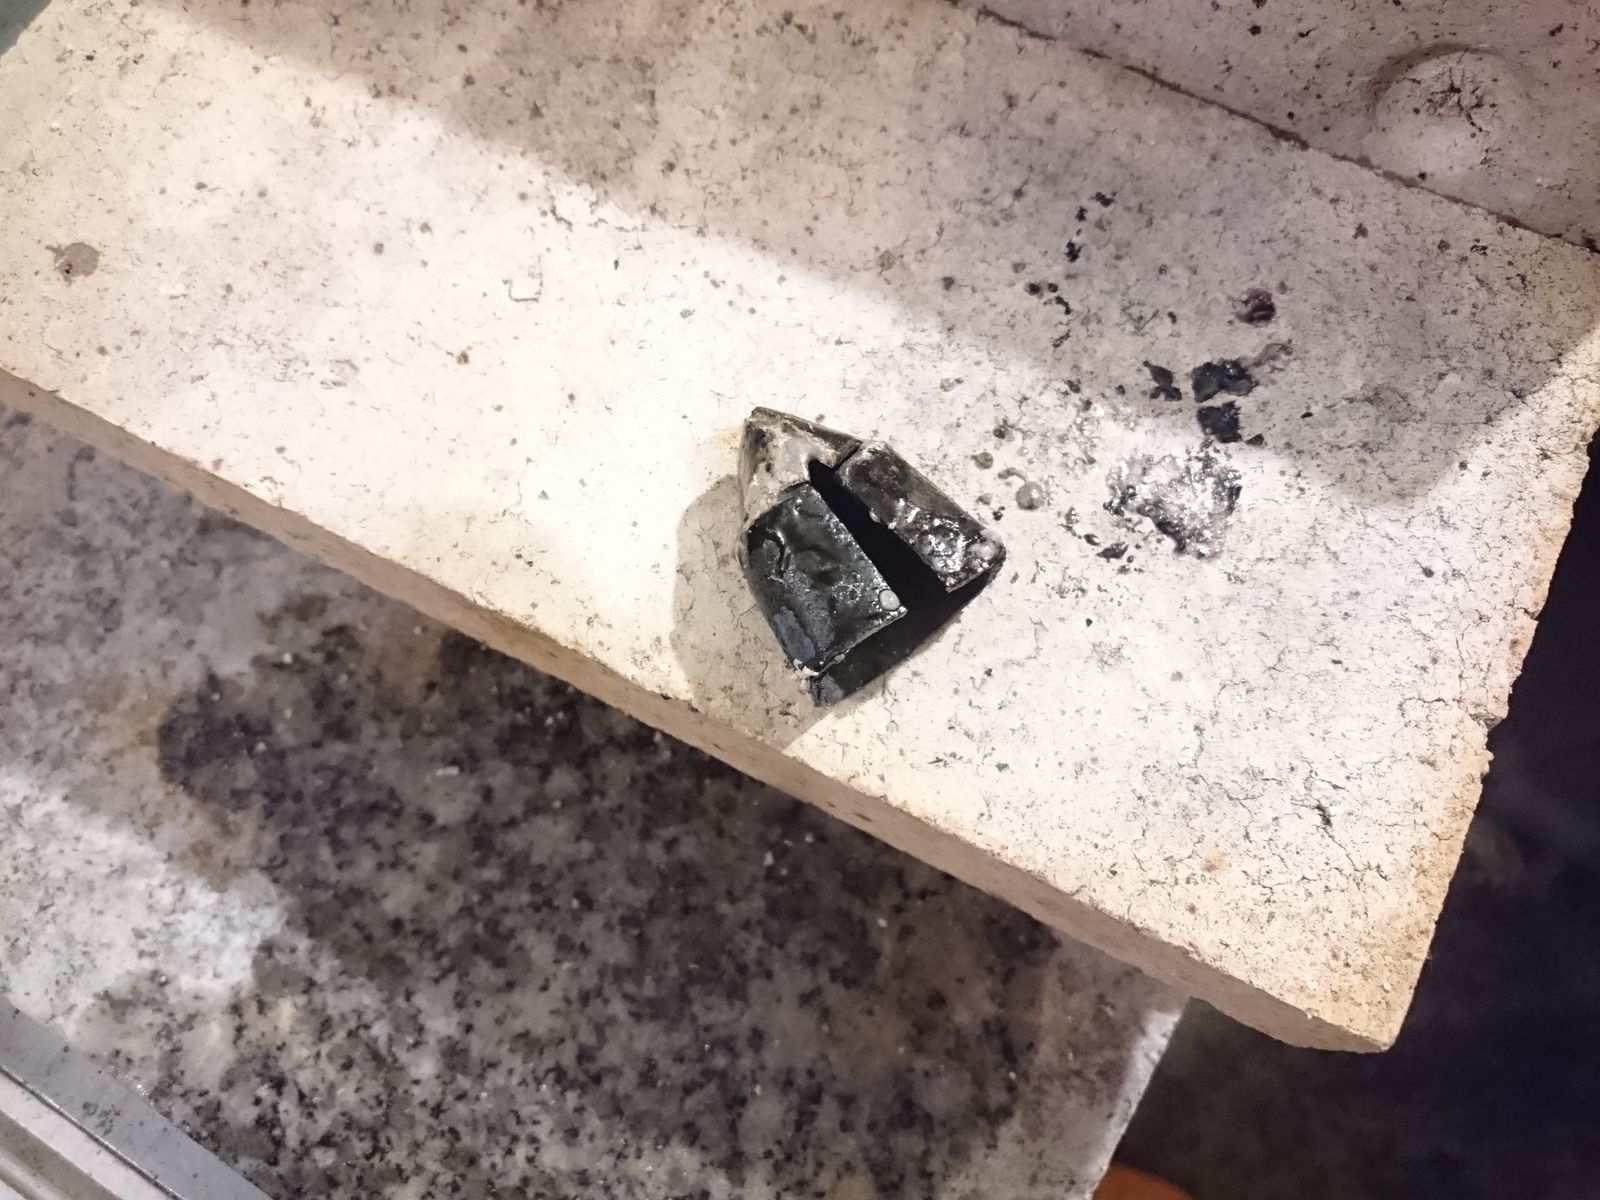 With this I was finally able to bend and hammer the steel flaps all around so the fit more or less snugly around the tip of the scabbard. I did not want to close it all the way around and I intended to leave the stitching visible, because it was more or less clear that I will have to hammer and ever so slightly bend the finished chape onto the tip so it holds and does not fall of. However, I wanted to at least braze the gaps on the sides. I failed to do that, because I run out of silver solder and I will be damned if I spend another 10 € on this. At this point, I was starting to hate the thing. So I brazed as much as I could and sod the rest. Here you can see it all black, covered in solder and slag and scale. I have again carefully ground the excess solder with fine file and collected the silver dust, but I still did not feel like experimenting with making solder out of that dust.
 This is when It I have got the only idea during this whole process that I consider valuable – I have found out that old, nearly worn angle grinder wheels are excellent for scraping of the scale and the slag – both of those are harder than files and they tend to smear abrasive papers. So a bit of water now and then to wash of the dust and a bit of scrubbing with an old wheel and I could proceed to polishing without covering my belts with grime. Polishing I have performed the same way I did with the throat. During this I have found out that the chape is much more asymmetrical than I was hoping for and that there are two poorly brazed spots on the sides. leaving unseemly spots, but as I said, sod it, I am not going to do this thing again.
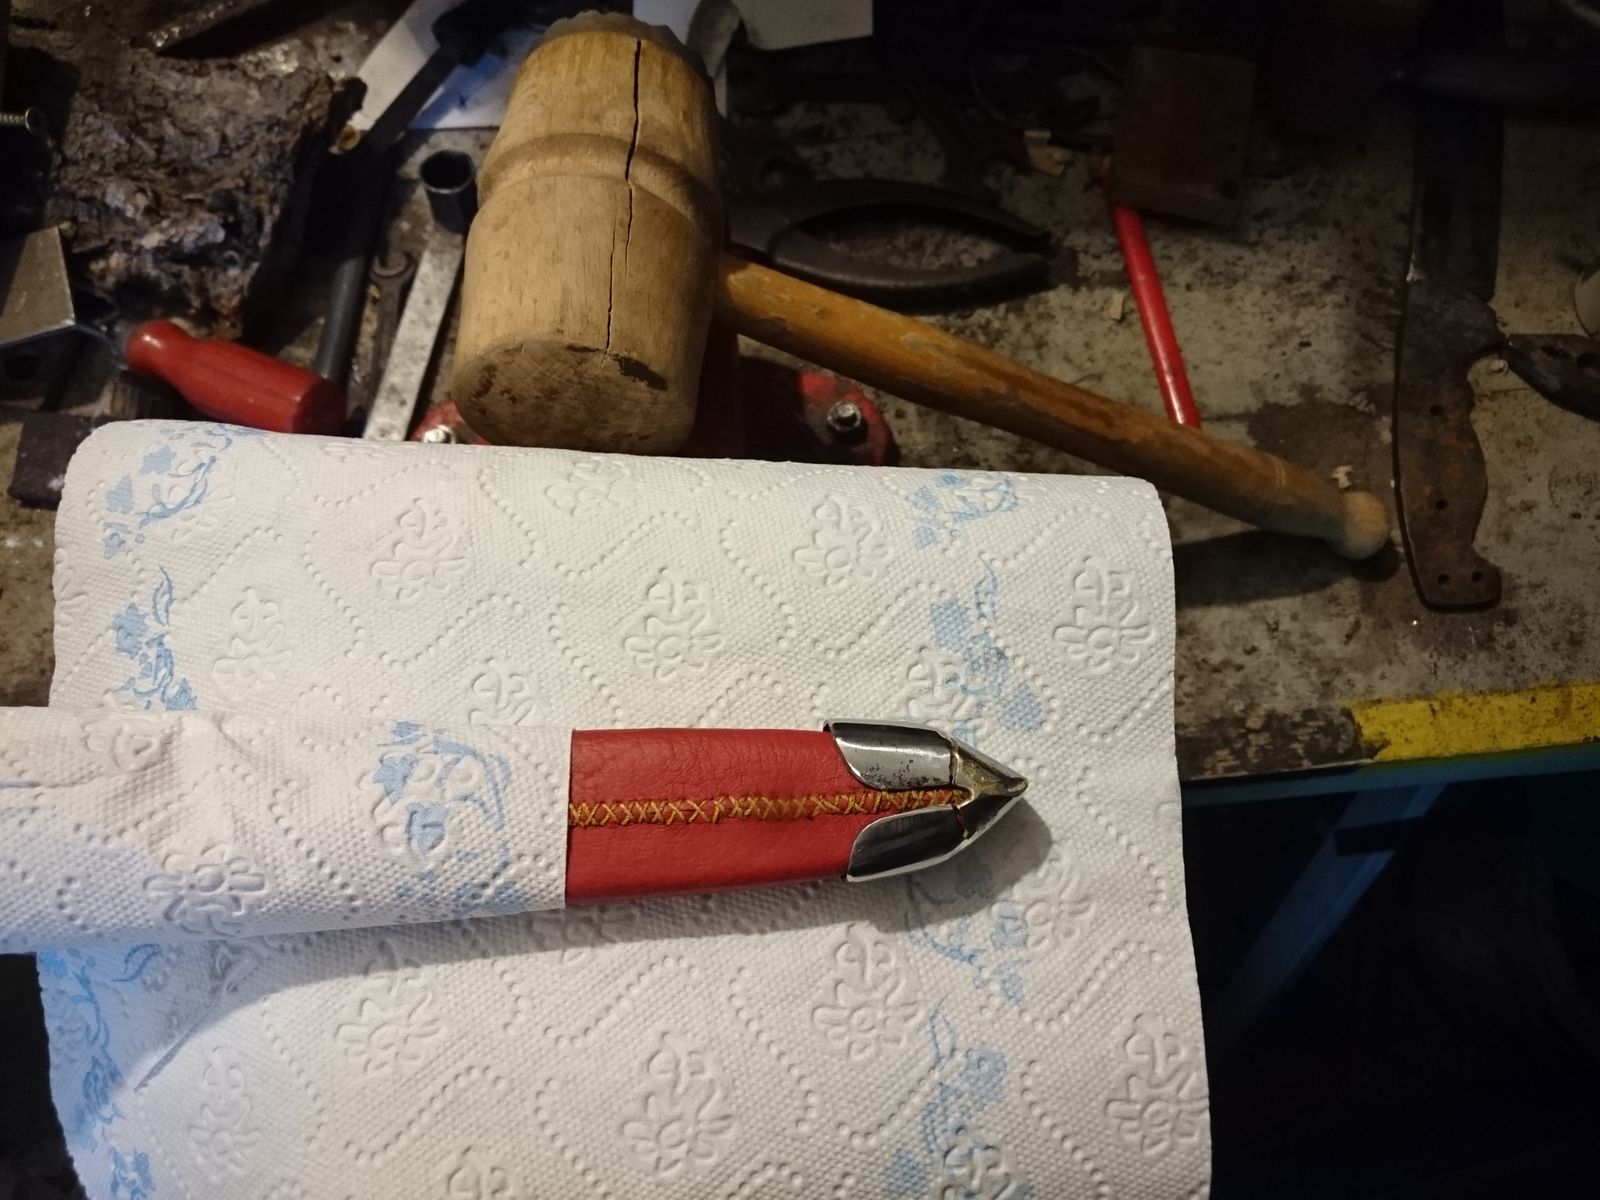
When the chape was finished, I have put it and the throat on the scabbard and gave both parts a few wallops with a wooden mallet on a wooden board so they hold in place (for the throat I had to put a piece of leather on one side between the backside of the scabbard and the throat for better fit). And then I walloped it all some more so it holds.

 So now the project is almost finished. All that is left to do is to sharpen and sign the blade, tie a leather strap around the scabbard and treat it with dubbin and make pictures. Neither of those things should pose any big problems and except the signing they cannot destroy anything. I hope.
Despite being a non-believer, I do understand the desire to be able to pray – a desire to have some control.
You really had to push it to make it. The end result isn’t perfect but I think it still looks fine and it’s yours, made by a human, not by a mythical blacksmith hero like Ilmarinen.
Congratulations on finishing a very complicated journey!
I am just in awe of what you have made, even if it is not perfect. I can never not see the errors in things I make when they are finished, but others tell me they are lovely, gorgeous, beautiful. I can only see the beauty in what you have made Charly, even if you are not satisfied.
Charly
It’s beautiful, even more seeing all the work, effort, disappointment and satisfaction you’ve put into it. I can’t wait to see the finished product.
And also what jazzlet said.
Although I have nothing to add or contribute on the topic of making rondel daggers, I’ve enjoyed seeing your progress on this project. Congratulations on almost finishing it, I look forward to see the finished product!
Charly,
I think you did a wonderful job on this piece of your scabbard. It looks good!
Making a home-made punch and die set is incredible. I have the utmost respect for your creativity and adherence to medieval techniques to make this dagger.
I have been reading your progress the whole time,
Congratulations on being nearly done!