So whilst I am coating the dagger handle, scratching it with 600 grit paper and giving it each day a slight buff with acetone diluted linseed oil, I can continue to work on the scabbard. It will take a few weeks for the linseed oil to harden really properly, so there is no rush. However some of the works shown here were done in parallel with works already shown.
 First thing to do is to properly shape the scabbard, leaving only about 1 mm thickness. Because the poplar wood that I have used is extremely soft, I was afraid to cut it for fear of taking away too much material. The most important rule in woodwork is – you can always cut, but you cannot ad. So I did not use chisels or a rasp, just an 80 grit sandpaper on a padded sanding block. My sanding block is a piece of wood with old carpet glued on the faces, and I am spanning on it endless belts that I used for my now dead small belt grinder. A wine cork is an excellent spanning device, allowing for quick change of belts and giving me the option of slack belt as well. When sanding around the throat of the scabbard I took care for the throat always face downward, so no loose grains fall into the scabbard and ruin the blade.
 Next thing that I have done was to soak the whole surface with hot hide glue, priming it so other materials can be glued on. After the hide glue has dried, I have covered the scabbard with linen, which I have again thoroughly soaked in hot hide glue. I do not know whether this was actually done for scabbards (although from some of the images that Caine has posted it seems plausible), but I know for sure that the technique was known from early medieval times through to the modern times. Covering wood in fabric soaked in hide glue is very effective way to prevent the wood from splitting and twisting. Firstly it adds fibers that are perpendicular to those of the wood, secondly hide glue shrinks significantly as it dries, effectively pressing everything tightly together. This is one area where real hide glue has an irrefutable advantage over any modern glue. After the hide glue has dried up, I have again sanded the whole thing with 180 grit sandpaper to smoothen all knots and irregularities in the fabric.
 To remain true to the game, I should use plain vegetable tanned leather, but this is one of the instances where I deliberately choose to stray away from my template and do something differently. For years I have a piece of dashing red leather that I wished to use for this project from the very beginning. It was of very irregular shape, but I was able to cut a piece big enough to cover the whole wooden scabbard from tip to throat. First I have cut a rough rectangle and then I continued to cut away tiny strips here and there until I had a piece that could be wrapped tightly around the scabbard with just about 1 mm space between the edges.
 Then I had to make holes for stitching. This is fairly thin leather, so I had to make the holes very close to each other for fine stitching. I have made leather sheaths before, but I have never done this, so I did not know how exactly spaced the holes should be. I reasoned that about two-three times the thickness of the leather space between the holes and from the edge should be about right in order to be able to sew the edges together tightly without the leather ripping.
I could not find my awl, it seems that I have lost it. Luckily I had this super old knife whose blade was almost completely eaten away that could be quickly modified for the task of pokey-holey. About 200 holes. Oh boy.
 For sewing I was going to use thick thread that is used for sewing jeans. For thicker leather I would have used thick linen thread, but that was a bit too thick for this job. Other threads we had at home on the other hand were too thin.
Before sewing, I have soaked the leather in lukewarm water (about 37 °C) for an hour so it becomes more stretchy and pliable. And I prepared the thread with the use of the unseemly mixture you see on the picture to the right. That mixture was made by boiling pine resin and beeswax and it was used by medieval shoemakers and saddlers to coat the thread before sewing. What are the advantages of that, you ask? Well it makes the thread bugger to work with as it becomes all sticky and latches onto everything – hair, pants, fingers, itself… Oh sorry, you asked about advantages. The thread does not split or fray during work, it is firmer and sleeker, despite the stickiness. If I coated the thread in advance and let it dry for some time It would not even be tacky, but I forgot about that. And I did not know how much thread I will need – it transpired that about ten times the length of the scabbard is about right.
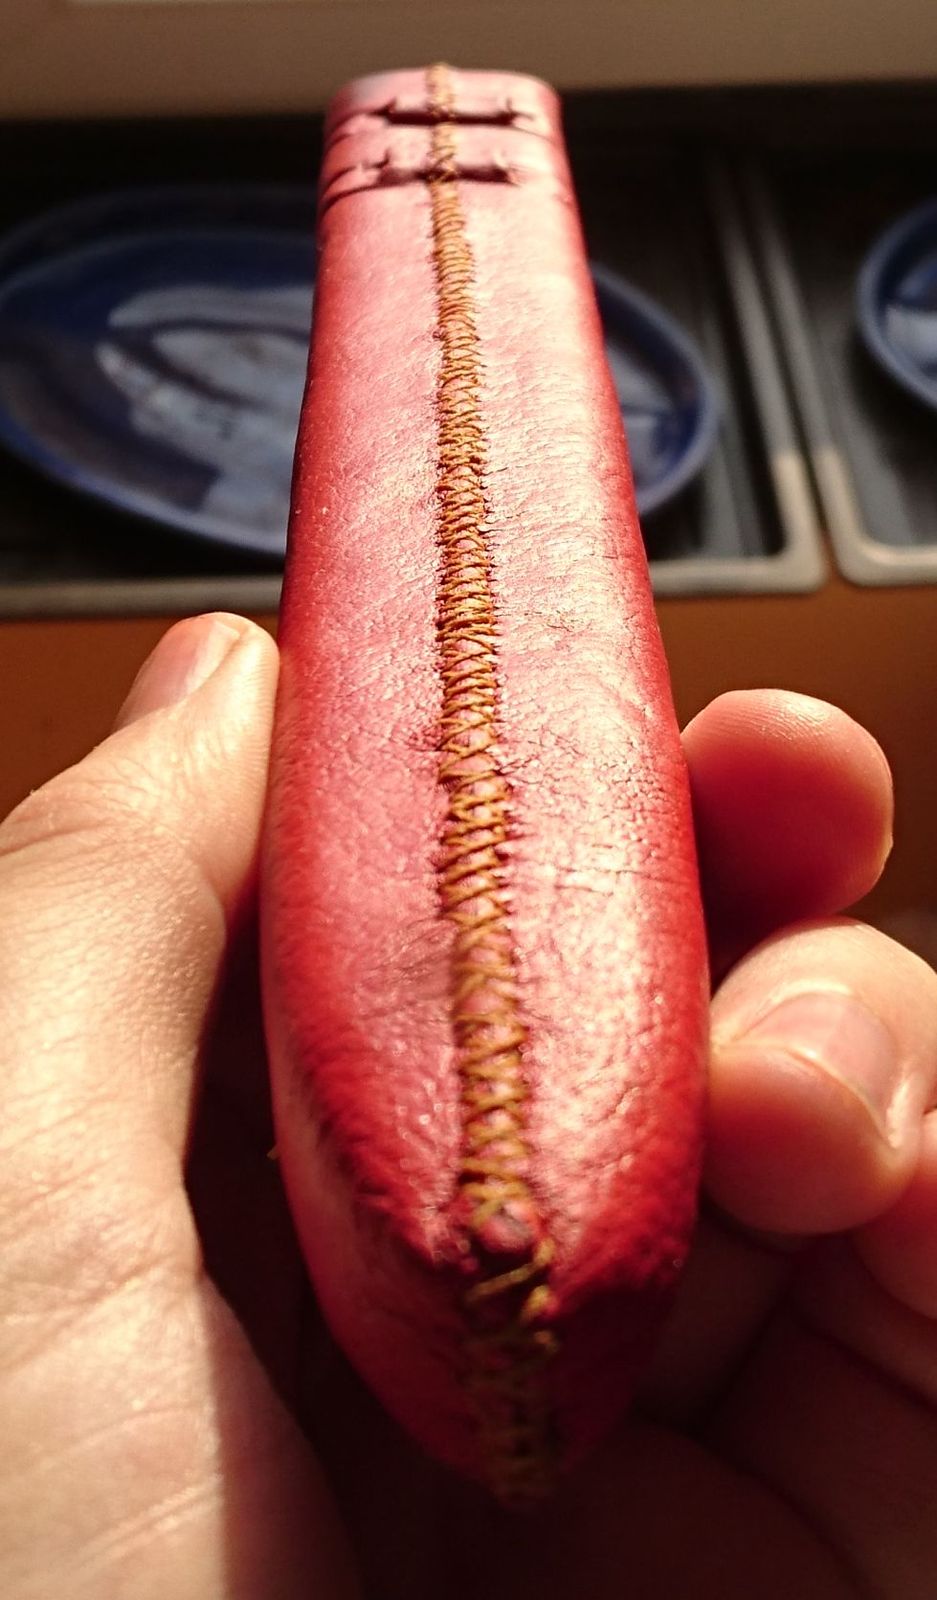
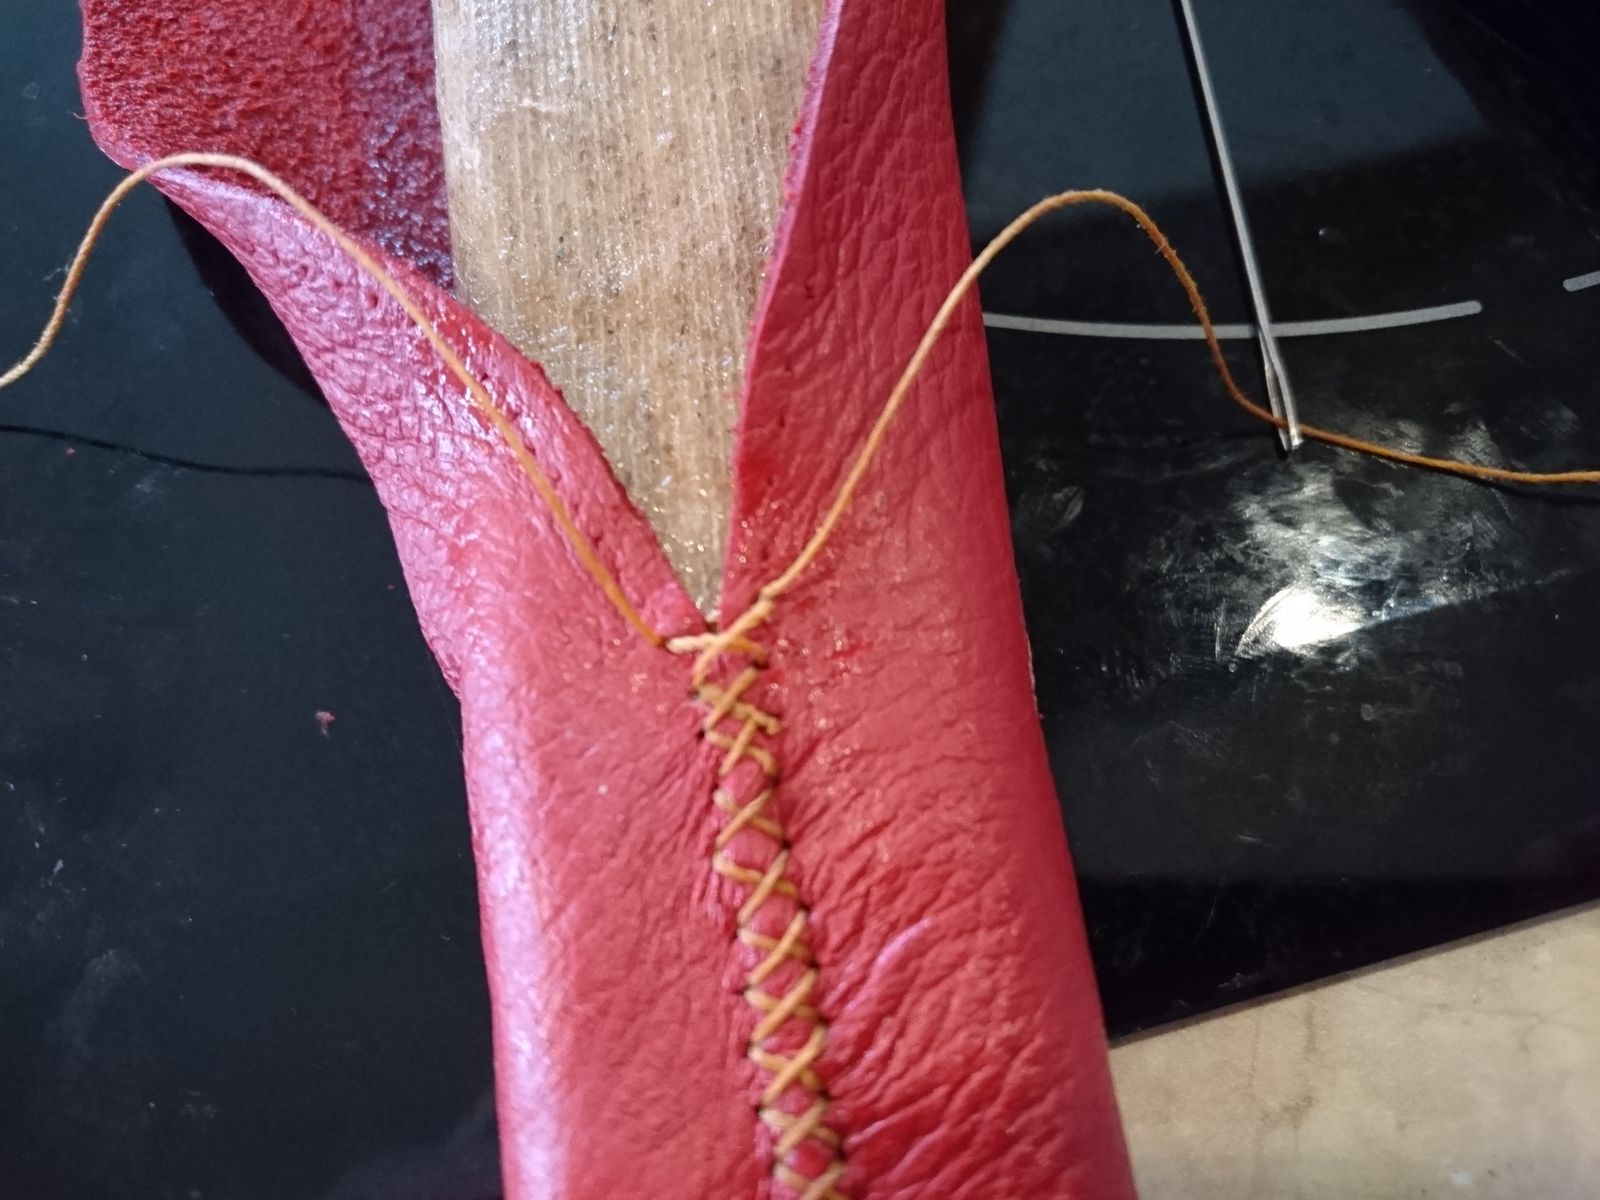 When the leather was all soaked, I have prepared a small batch of hide glue again and started covering the scabbard. First I have sewn together the tip and about 1 cm of the length. Then I painted that part and the whole face of the scabbard with hide glue and inserted it in the leather pocket and started sewing and adding hide glue all round for each sewn piece. I have used a two-needle technique that I have found on the internet. It has the advantage of pulling the edges together very regularly and equally on both sides, so it does not warp and zig-zag as it could had I used just one thread. I must be honest with you – my needle work leaves a lot to be desired. I was doing my best, but I was losing the holes in this very thin leather and I skipped a few here and there without wanting to. It took me two hours to sew the whole scabbard – about 100 stitches on 27 cm length. My back ached and I was happy when it was over.
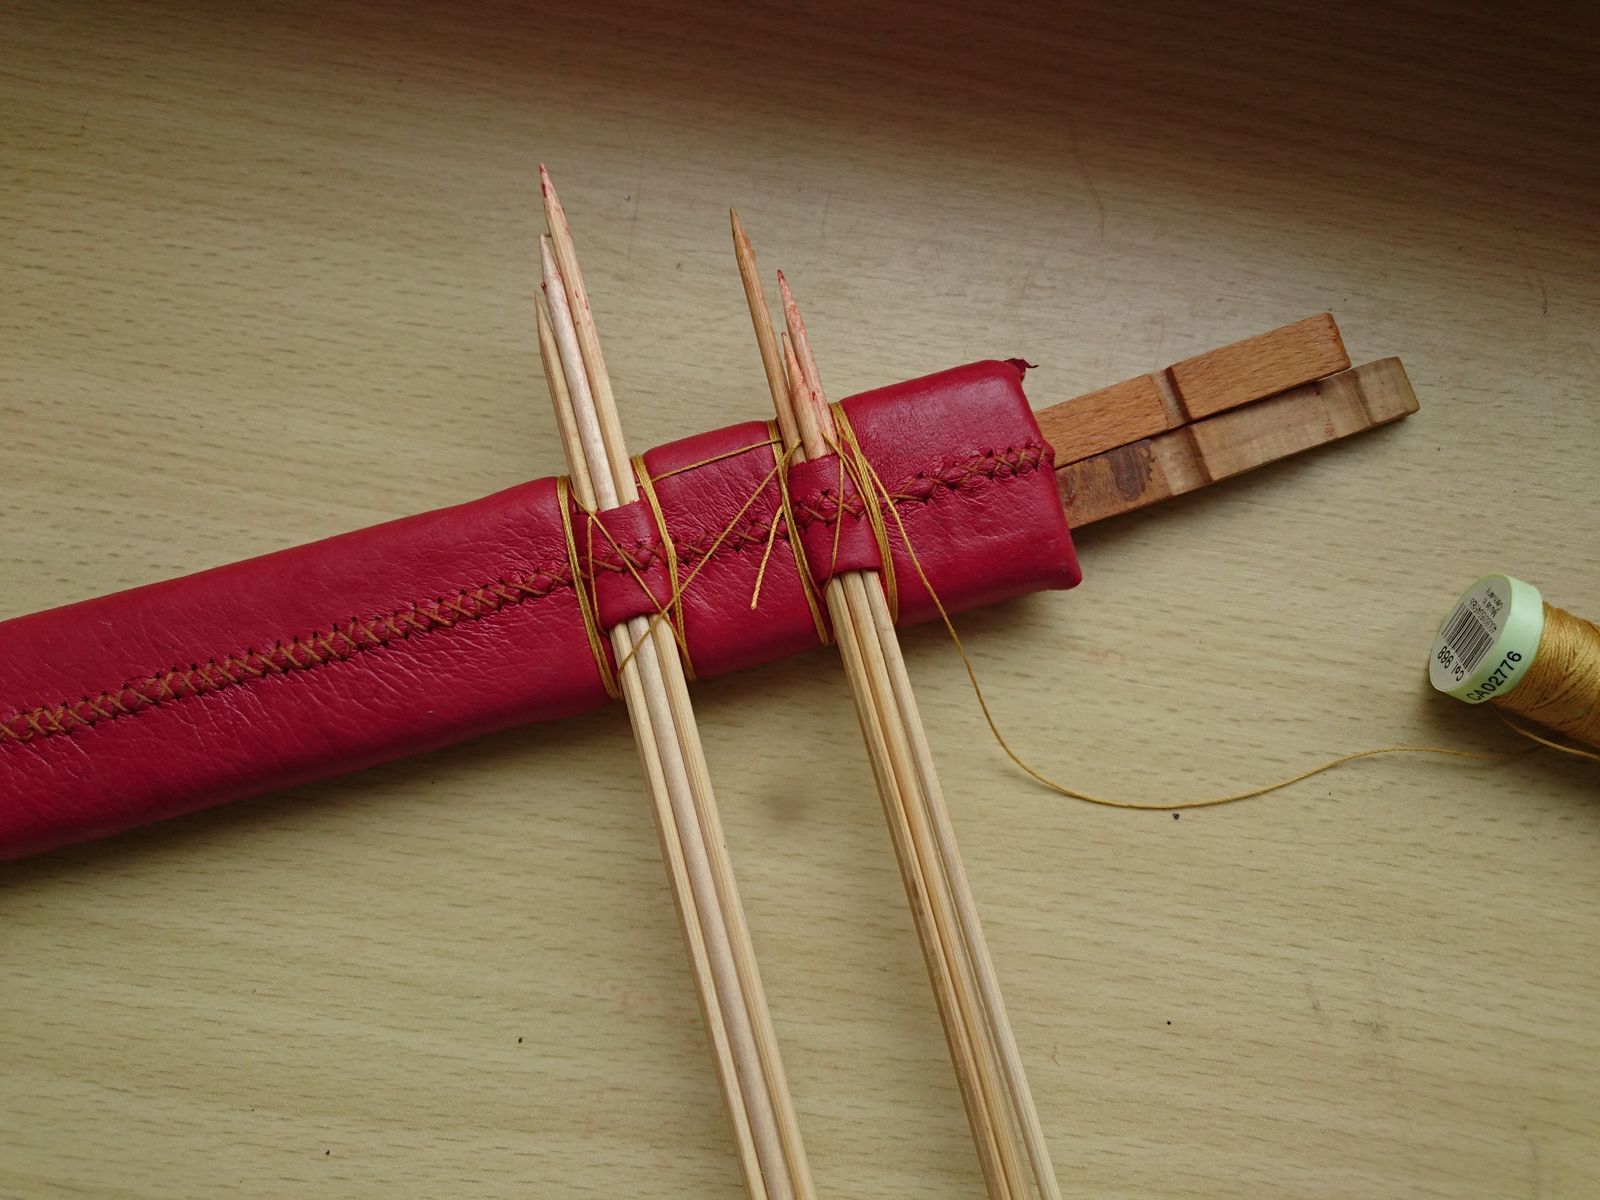 Last step was to poke and wrap holes for the straps. For these I have simply cut holes with a scalpel and inserted in the wet leather three skewers. The thread wrapped around will make visible grooves when it all dries up. If I wanted to, at this point I would also stamp and press the leather to decorate it. But I did not want to bite more than I can chew, for this project plain leather will have to do. I also formed the leather around the throat a bit, although I will have to get back at it once more – when it dries, I will have to cut all excess, wet it again with hot hide glue and form it better.
 The scabbard is now nearly done, but the most challenging part is yet to come – I want to make metal chape and throating. And that is something I have never done and I will have to be really, really careful to not botch that up. And also think hard about how to do it, before I go cutting, bending, banging and soldering metal pieces together.
More about that next time. In the meantime you can admire my irregular stitches.
Charly:
I am admiring them! Looks a neat job to me, and of course, I love the colour choice.
It’s amazing work!
As for the sewing, have you tried curved upholstery needles? they may make things easier.
I love the way you’re doing this. So hardcore!
I make my sword scabbards out of ABS plastic, cut on a bandsaw and welded with acrylic solvent. The wraps are stainless steel wire, and the leather covering is held on with barge urethane rubber cement. It’s so much easier. You make me feel lazy.
I have to say I’d much prefer leather to any kind of plastic, and poplar is a good choice for a liner. I have a couple of dagger scabbards which use birch bark for the liner, and it’s lovely, but it doesn’t have much endurance to it.
Thanky you.
Giliell, we do not have curved needles at home, unfortunately. They count among those things that are not worth buying over the interwebs (shipping more costly than the article) yet are not available in any shop in the vicinity.
Charly -- heat an exosting needle and bend and quench it?
Marcus, I played with heating needles and pins yonks ago, and it is not easy. Needles are too thin to be heated and bend in improvised settings -- they either they burn away in a blink, or they air quench and are brittle again. So I think that I would need special equipment to do that, or to build special equipment. I am not as hardcore as that.
Hm, I figured you’d tried it. Over here leatherworking needles are ridiculously easy to score on ebay. Inhave an embarrassingly large supply of needles, hemostats, scalpel blades (I bought some case-lots back in the 90s). If I send you more metal I’ll try to remember to throw a few in.
Those stitches look beautiful. The whole thing does.
Charly, next time you’re in Germany, see if you can find a Turkish supermarket. It’s where I bought my last batch.
You’ve done beautiful work.
A lot of what you talk about here harks back to what (little) I know about cobbler’s/shoemaker’s work. Also when Giliell mentioned curved needles, cobbler was the first thing that sprung in my mind, I saw as a kid in TV how a shoemaker/cobbler would sew the leather with a curved needle.
Also, the coating of the thread brings into mind the pitch coated/trated thread cobblers have used here for shoes, called pikilanka (pitch thread, piki = pitch). I guess it made the seams also more waterproof in boots.
Most people I know cut linseed oil with turpentine (real, derived from pine, turpentine) or mineral spirits (white spirits, solvent naphtha,) for the first coat, then multiple thin coats of linseed oil (wipe-on/wipe off/let cure and repeat ad nauseam.)
Do you have a better result with acetone?
fusilier, neanderthal wooddorker
James 2:24
@fusilier, first reason for using acetone instead of turpentine is very prosaic -- I run out of turpentine and it will be awhile before I will have opportunity to buy a new bottle. And the only organic solvents that I had were acetone and toluol. The second resason is health -- from these two I prefer to work with acetone whenever possible, because it is far less of a health hazard.
I am expecting neither better nor worse results. The solvent is there only to lower the viscosity and increase wetting capability of the oil so it can penetrate deeper into the wood pores when applied. This it did, so I take it as mission acomplished.
Personaly I think any organic solvent capable of dissolving oils would do, even ordinary petrol.
I am not going to run a long-time peer reviewed study to test that hypothesis, although I would love to :).
I think you did wonderful stitches there, Charly! Reminds me of the time just after School when I made half-fantasy leatherwares for some friends and my self (for use in Larp and medivalish-stuff.).
Stiching leather is really hard but it is also wunderful stuff, when you learned how to handle it.